Install-ApacheDS
- ApacheDS安装 [ LDAP和Kerberos ] 配置
- apacheDS ldap 安装,配置,增删查该及备份恢复
- (超详细图文)apacheDS安装与LDAP/kerberos配置
- 快速搭建Kerberos服务端及入门使用
一 .前言
1.1. 安装包
1.2. 名词含义
| 名词 | 全称 | 含义 |
|---|---|---|
| CN | Common Name | 为用户名或服务器名,最长可以到80个字符,可以为中文; |
| OU | Organization Unit | 为组织单元,最多可以有四级,每级最长32个字符,可以为中文; |
| DC | Domain Component | 域组件 |
LDAP 目录类似于文件系统目录。
下列目录:
DC=redmond,DC=wa,DC=microsoft,DC=com
如果我们类比文件系统的话,可被看作如下文件路径:
Com\Microsoft\Wa\Redmond

例如:CN=test,OU=developer,DC=domainname,DC=com
在上面的代码中
 cn=test 可能代表一个用户名,
 ou=developer 代表一个 active directory 中的组织单位。

这句话的含义可能就是说明 :
test 这个对象处在domainname.com 域的 developer 组织单元中。
二 .安装apacheDS
2.1. 安装ApacheDS
设置安装目录,设置JDK位置
2.2. 安装Apache Directory Studio
注意: Apache Directory Studio 安装有点坑, 要求JDK必须为11以上. 需要修改 ApacheDirectoryStudio.ini
-startup
plugins/org.eclipse.equinox.launcher_1.6.0.v20200915-1508.jar
--launcher.library
plugins/org.eclipse.equinox.launcher.win32.win32.x86_64_1.2.0.v20200915-1442
/studio-rcp/resources/icons/linux/studio.xpm
###
#Uncomment_to_configure_the_language
#https://directory.apache.org/studio/faqs.html#how-to-set-the-language-of-studio
#-nl
#en
###
#Uncomment_to_configure_Java_version_to_use
#https://directory.apache.org/studio/faqs.html#how-to-set-the-java-vm-to-use
#-vm
#/usr/lib/jvm/java-11-openjdk/bin/java
-vm
D:/Develop/jdk/jdk-17/bin/java
-vmargs
-Dosgi.requiredJavaVersion=11
###
#Uncomment_to_configure_heap_memory
#https://directory.apache.org/studio/faqs.html#how-to-increase-the-heap-memory
#-Xms1g
#-Xmx2g
2.3. 配置连接
创建连接,设置连接信息,默认端口为: 10389
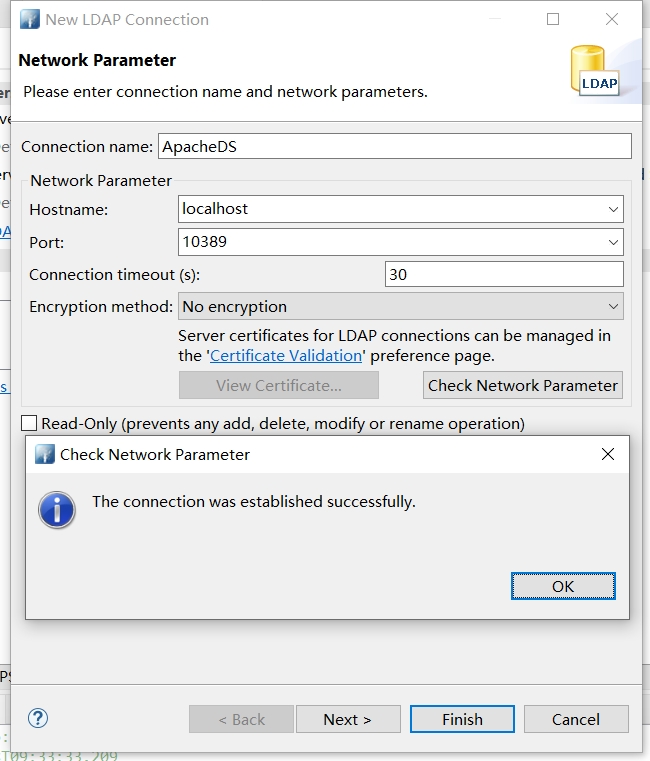
点击Next,设置用户信息
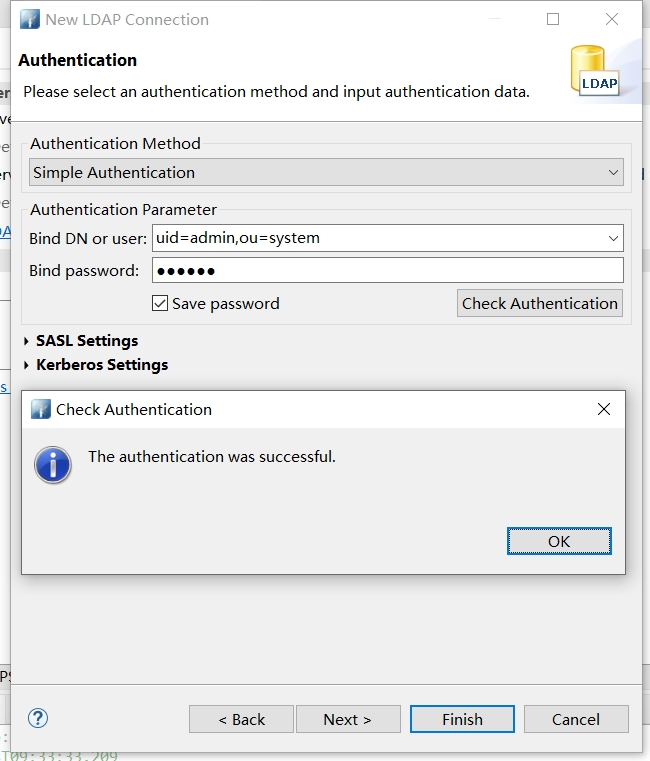
默认账号
- user:
uid=admin,ou=system - password:
secret
点击Finish保存即可
2.4. 设置分区
右击新建的连接名称ApacheDS,选择 Open Configuration,切换到Partitions页签
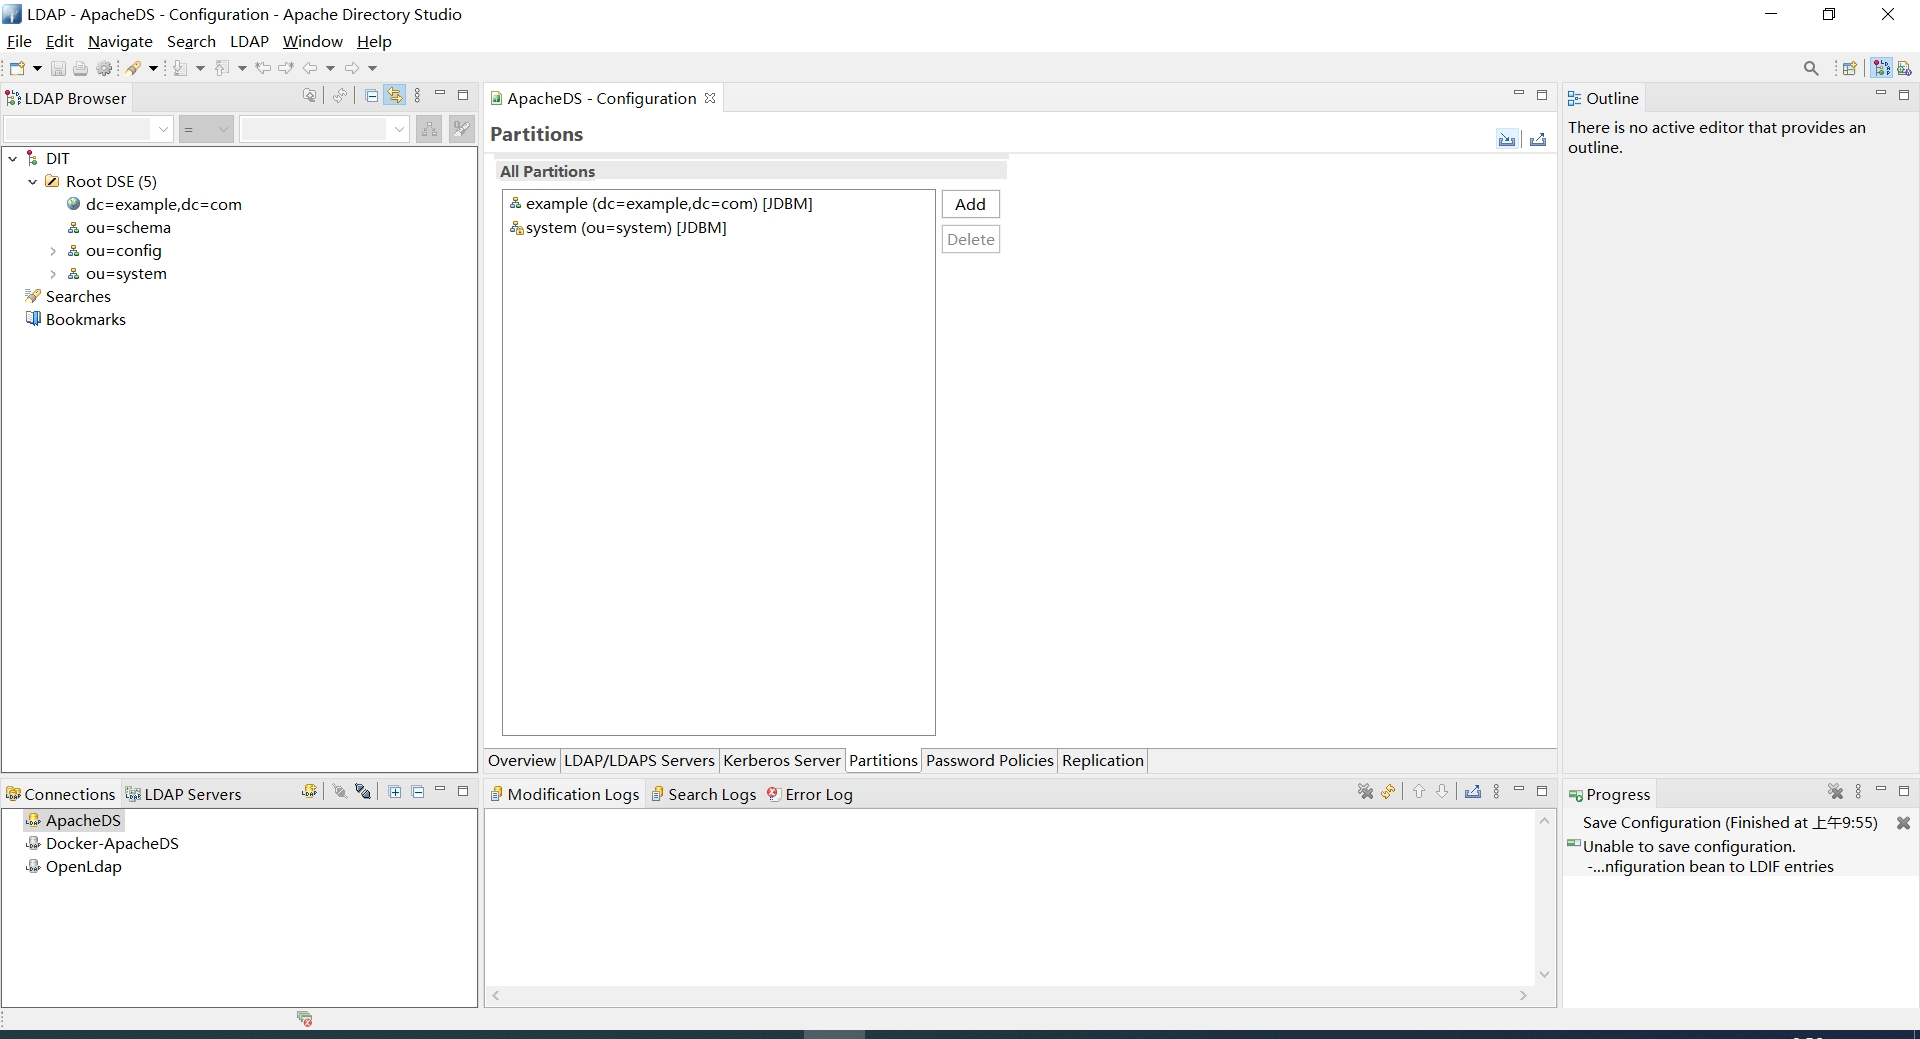
点击Add
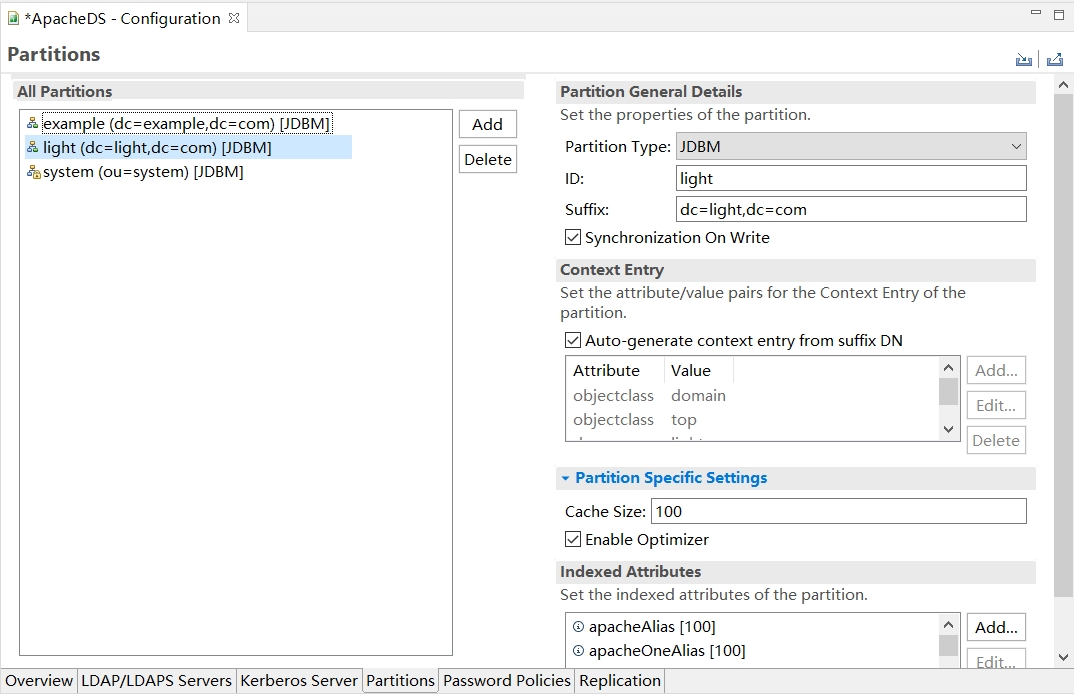
- ID: light
- Suffix: dc=light,dc=com
Ctrl+S保存, 重启ApacheDS
2.5. 添加组
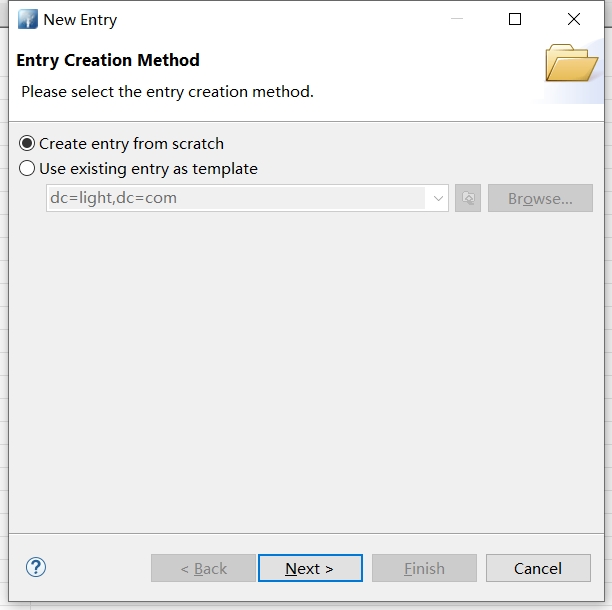
右键点击新建的 Partition - New - New Entry
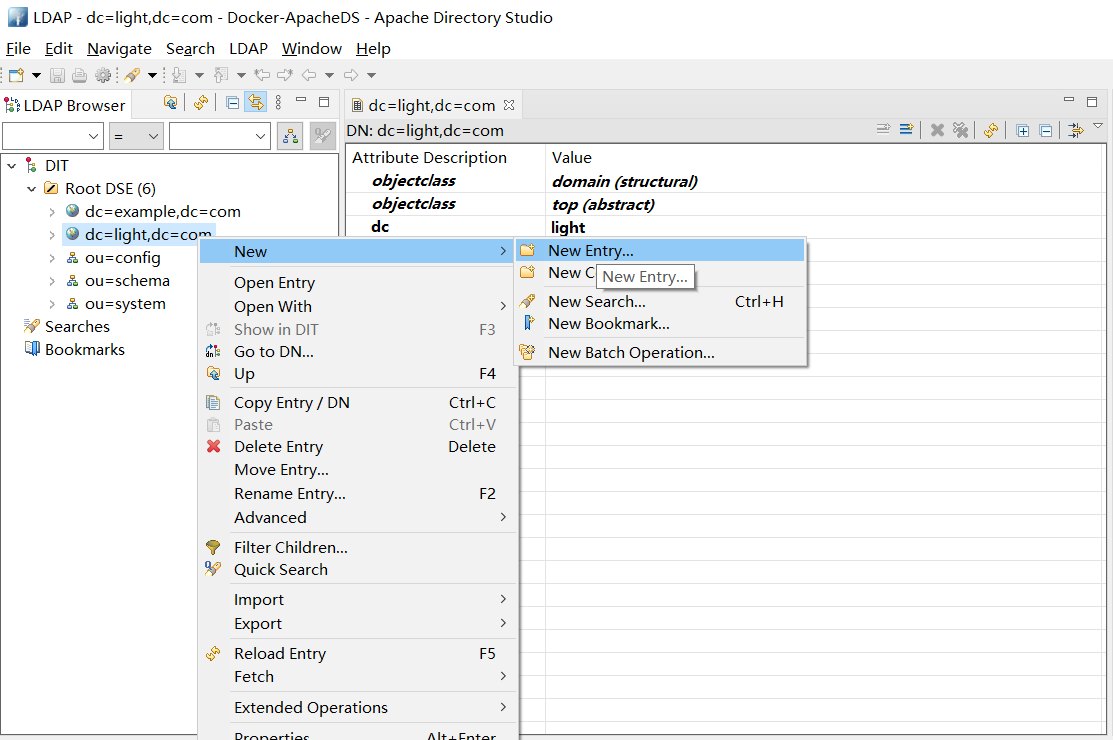
点击 Next
选择organizationUnit点击Add
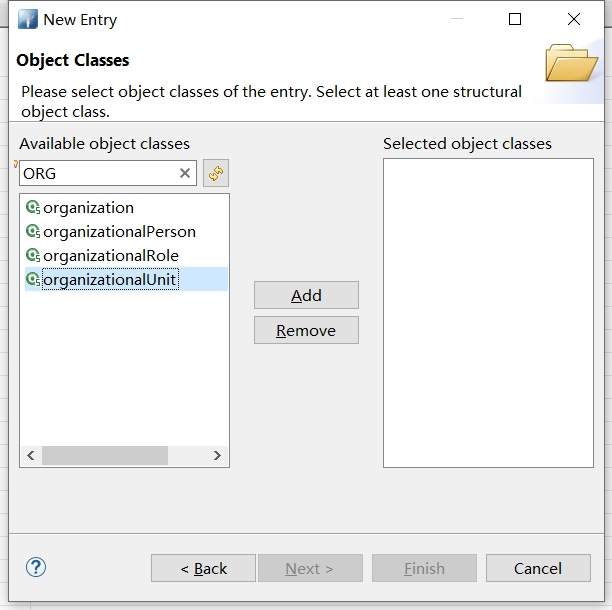
点击 Next
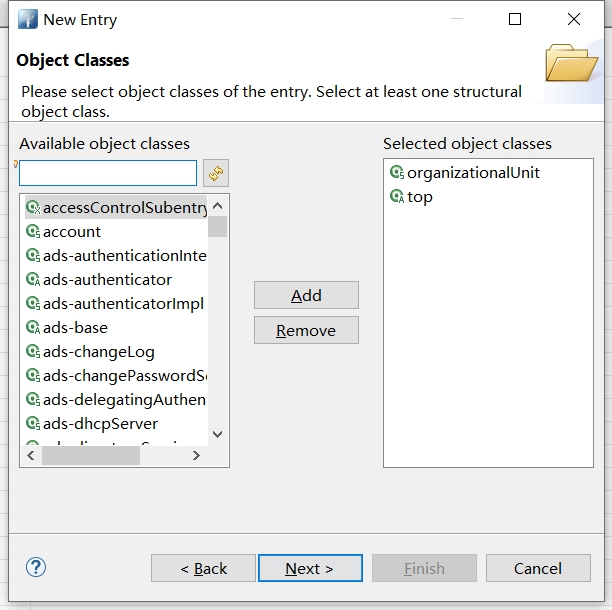
填入RDN信息 ou = Group,点击Next

点击Finish

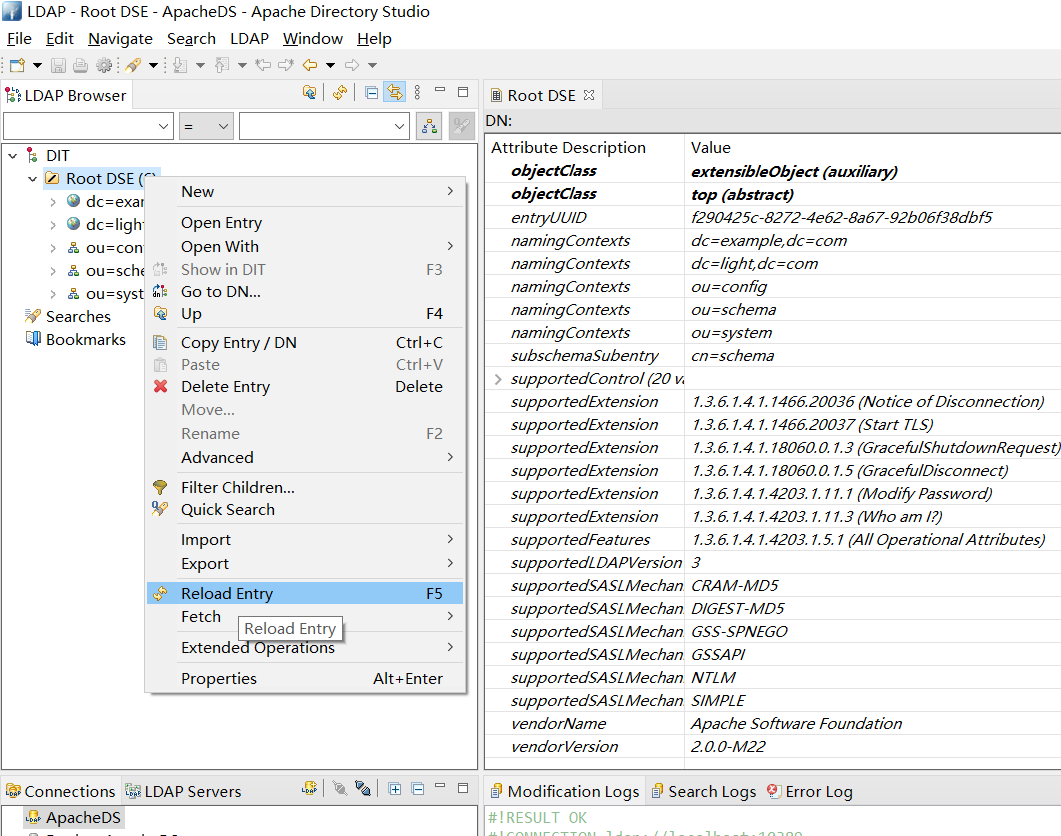
三 .修改配置
3.1. linux用户schema
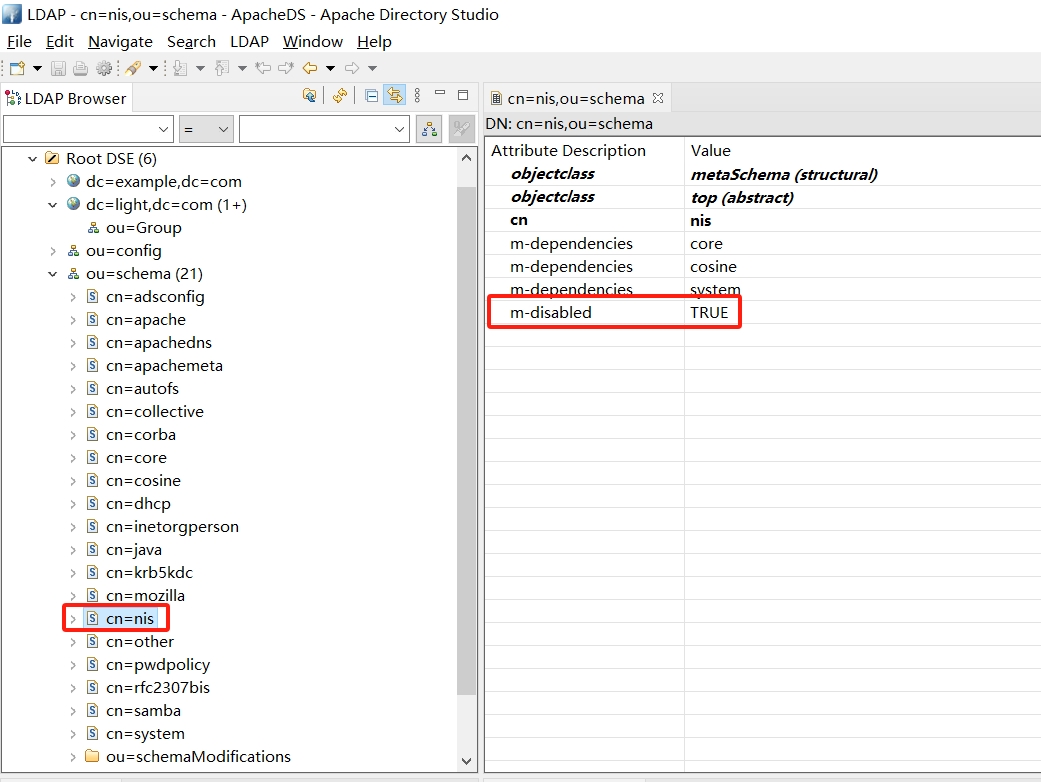
刷新 ou=schema
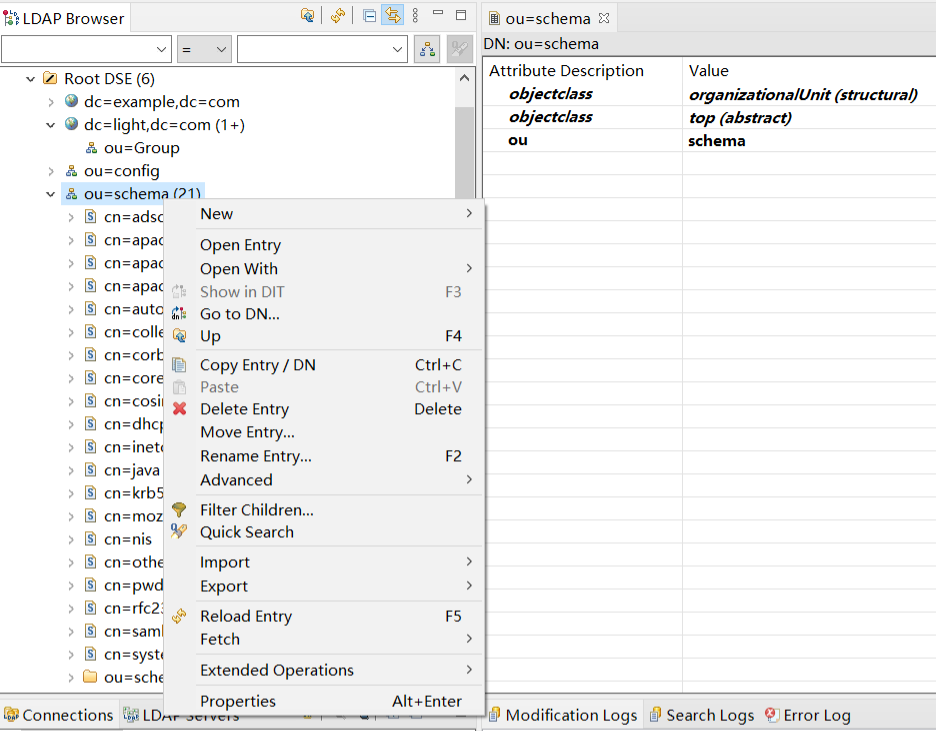
将cn=nis的属性m-disabled配置修改为False,修改之后就可以有posixAccount、posixGroup相关属性。
3.2. 添加测试组
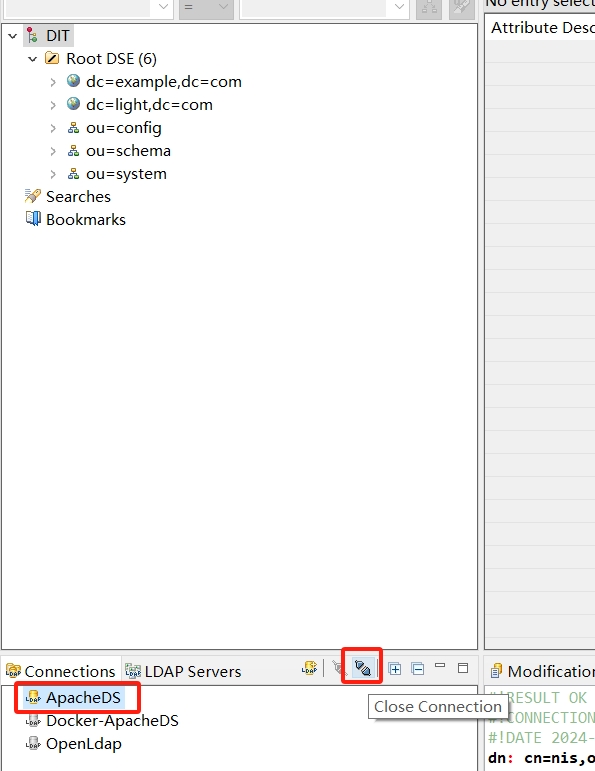
断开连接,重新刷新
添加组,右键点击新建的 ou=Group - New - New Entry
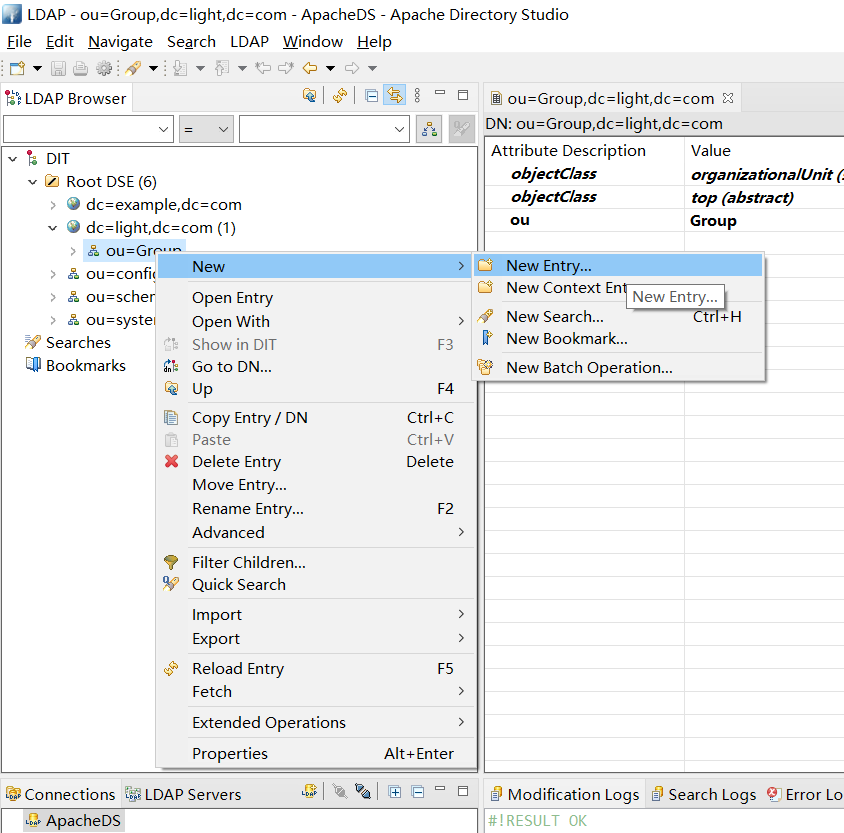
点击Next

搜索po,如果没有值可以刷新一下
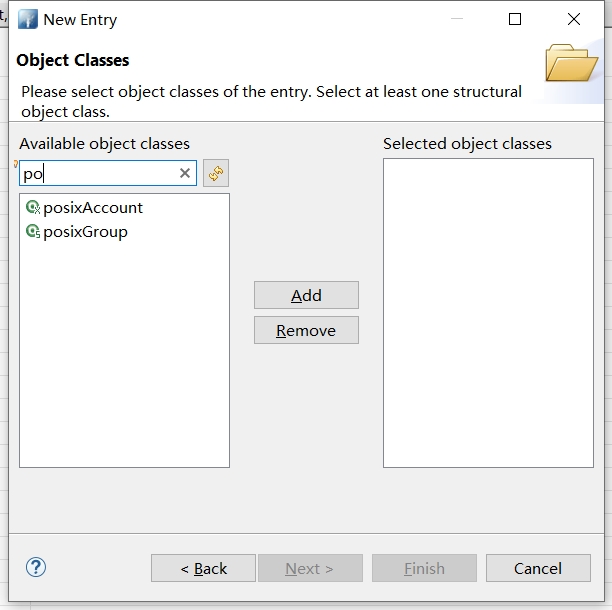
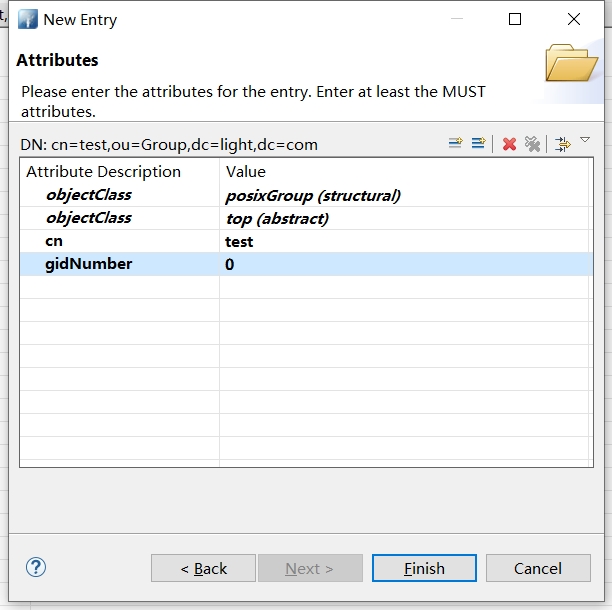
选择 posixGroup,点击Add
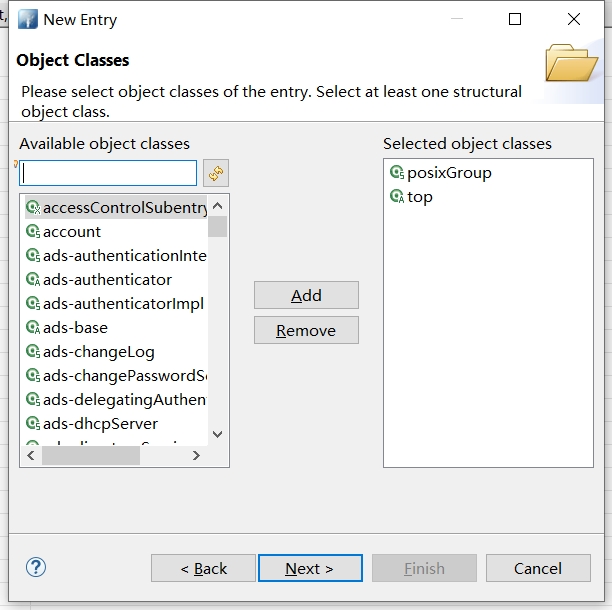
填入RDN信息 cn = test,点击Next
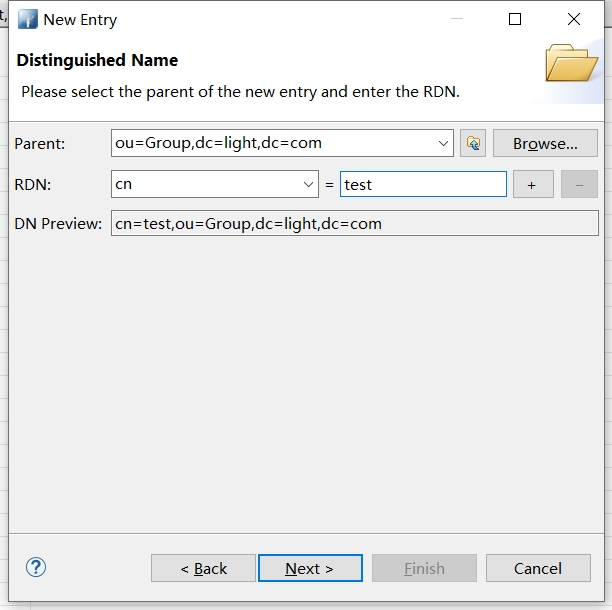
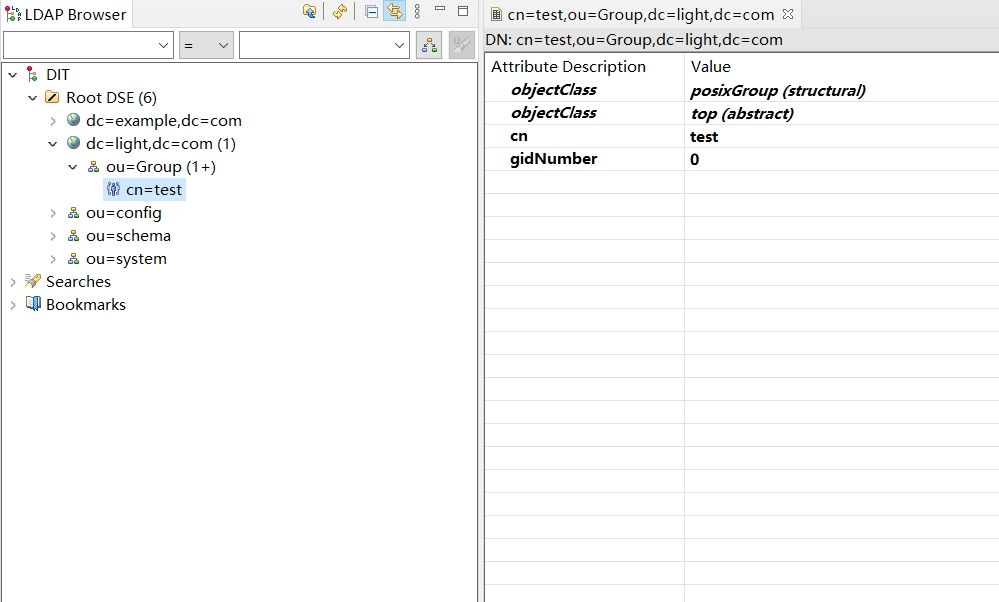
点击Finish
3.3. 添加用户
创建test.ldif文件
dn: uid=test,ou=Group,dc=light,dc=com
uid: test
cn: test
objectClass: account
objectClass: posixAccount
objectClass: top
objectClass: shadowAccount
userPassword: {crypt}!!
shadowLastChange: 18663
shadowMin: 0
shadowMax: 99999
shadowWarning: 7
loginShell: /bin/bash
uidNumber: 1000
gidNumber: 0
homeDirectory: /home/test
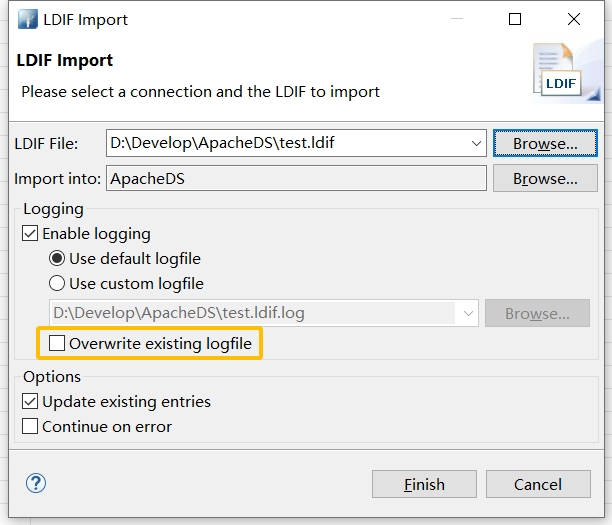
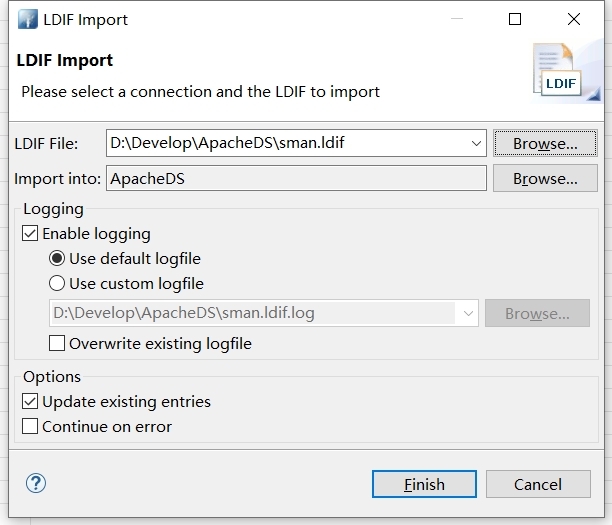
选择刚创建的文件导入用户
如果要覆盖之前的,可以勾选 Overwrite existing logfile
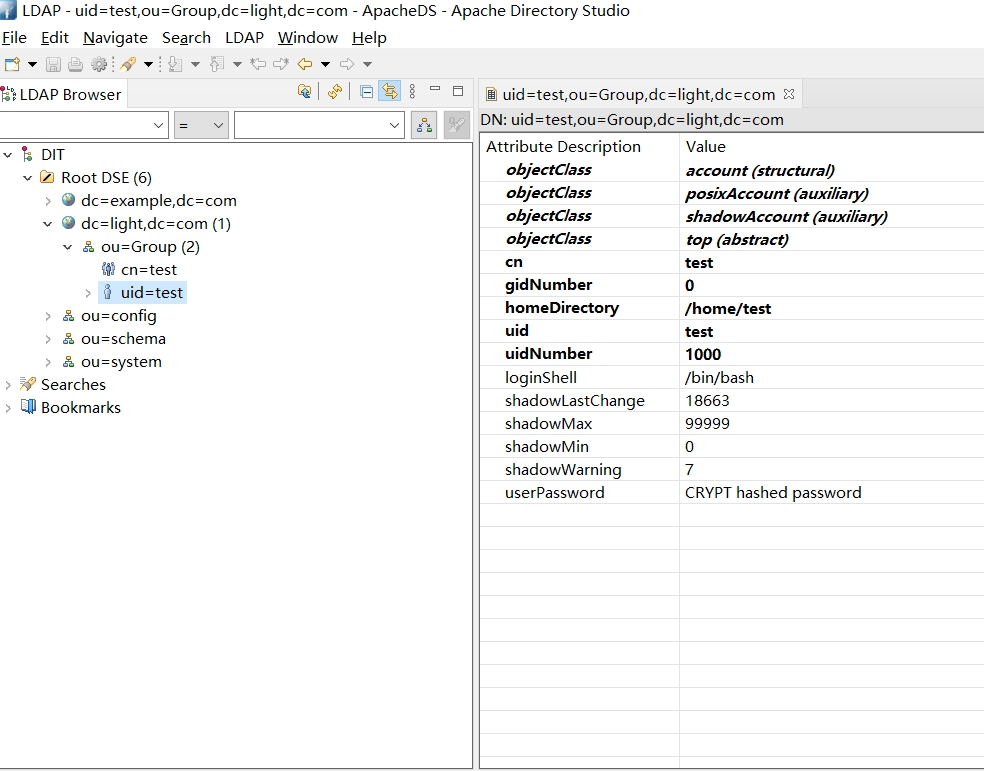
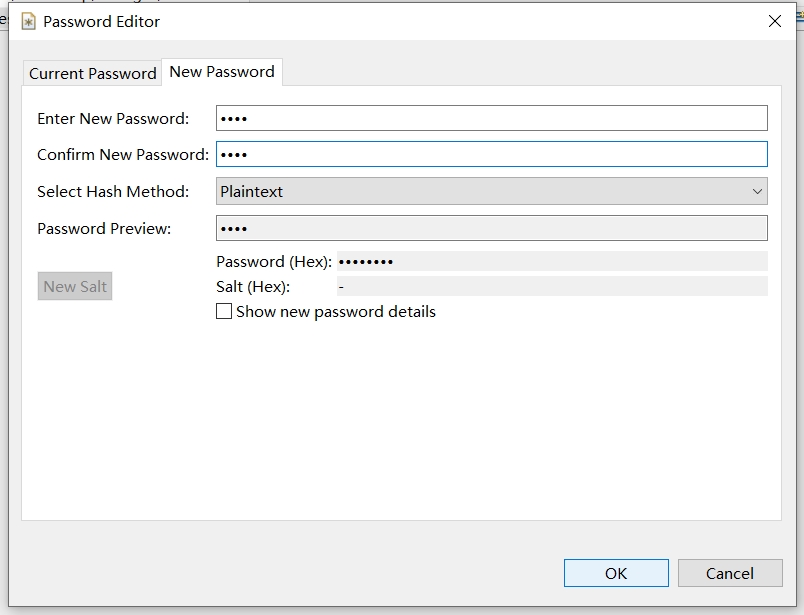
3.4. 修改用户密码
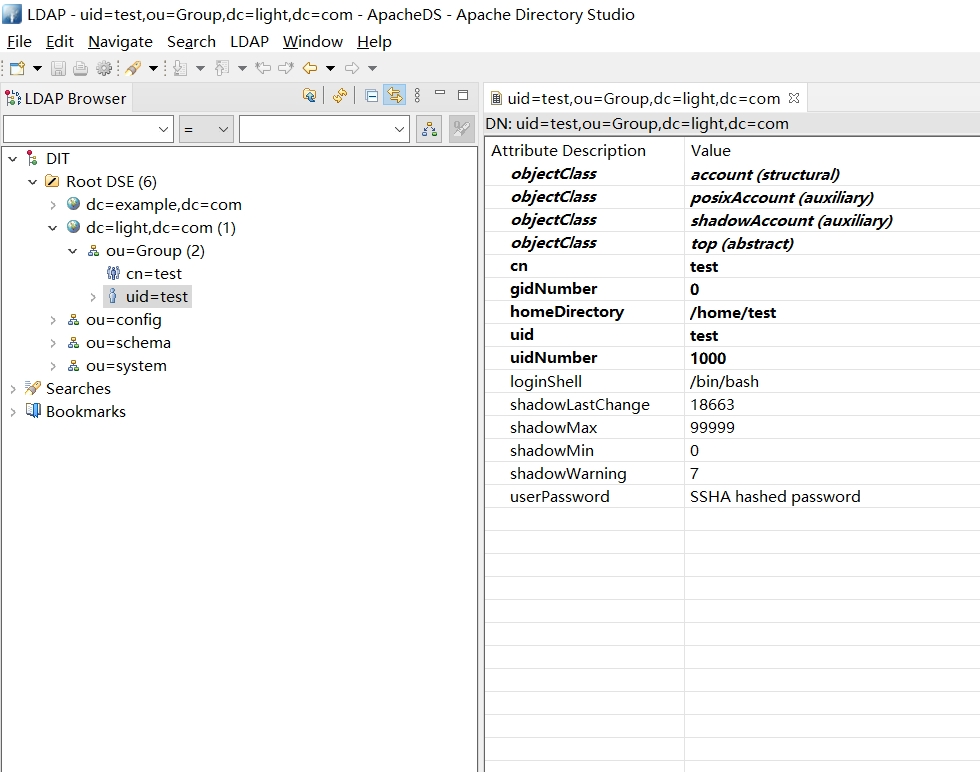
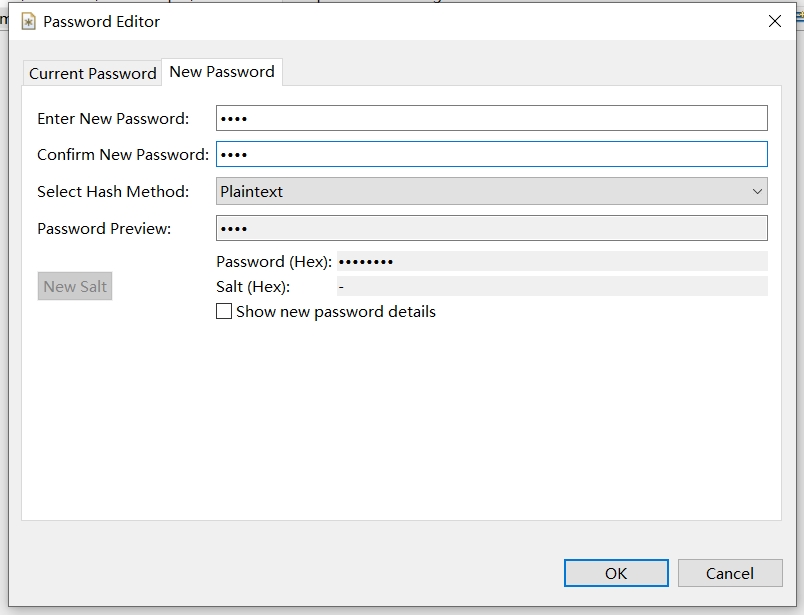
双击修改用户密码,将密码改为test

四 .LDAP用户同步
4.1. 安装LDAP client
前置环境处理
- 关闭SELinux
[root@localhost ~]# setenforce 0
setenforce: SELinux is disabled
[root@localhost ~]# sed -i 's#SELINUX=enforcing#SELINUX=disabled#g' /etc/selinux/config
[root@localhost ~]# grep SELINUX=disabled /etc/selinux/config
SELINUX=disabled
- 关闭iptables
查看防火墙状态
firewall-cmd --state
停止firewall
systemctl stop firewalld.service
禁止firewall开机启动
systemctl disable firewalld.service
- 在需要同步的物理机上执行安装指令
yum install nss-pam-ldapd openldap-clients openldap -y
4.2. 配置LDAP client
- 添加client服务器到LDAP服务,注意IP
[root@localhost ~]# authconfig --enablemkhomedir --disableldaptls --enableldap --enableldapauth --ldapserver="192.168.101.30:10389" --ldapbasedn="dc=yss,dc=com" --update

getsebool:  SELinux is disabled
[root@localhost ~]#
这个指令修改了/etc/nsswitch.conf 以及/etc/openldap/ldap.conf文件
- /etc/nsswitch.conf
[root@localhost ~]# cat /etc/nsswitch.conf  |egrep -v "^#|^$"
passwd:     files sss ldap
shadow:     files sss ldap
group:      files sss ldap
hosts:      files dns myhostname
bootparams: nisplus [NOTFOUND=return] files
ethers:     files
netmasks:   files
networks:   files
protocols:  files
rpc:        files
services:   files sss
netgroup:   files sss ldap
publickey:  nisplus
automount:  files ldap
aliases:    files nisplus
[root@localhost ~]#
- /etc/pam.d/system-auth
[root@localhost ~]# cat /etc/pam.d/system-auth
#%PAM-1.0
# This file is auto-generated.
# User changes will be destroyed the next time authconfig is run.
auth        required      pam_env.so
auth        required      pam_faildelay.so delay=2000000
auth        sufficient    pam_unix.so nullok try_first_pass
auth        requisite     pam_succeed_if.so uid >= 1000 quiet_success
auth        sufficient    pam_ldap.so use_first_pass
auth        required      pam_deny.so

account     required      pam_unix.so broken_shadow
account     sufficient    pam_localuser.so
account     sufficient    pam_succeed_if.so uid < 1000 quiet
account     [default=bad success=ok user_unknown=ignore] pam_ldap.so
account     required      pam_permit.so

password    requisite     pam_pwquality.so try_first_pass local_users_only retry=3 authtok_type=
password    sufficient    pam_unix.so sha512 shadow nullok try_first_pass use_authtok
password    sufficient    pam_ldap.so use_authtok
password    required      pam_deny.so

session     optional      pam_keyinit.so revoke
session     required      pam_limits.so
-session     optional      pam_systemd.so
session     [success=1 default=ignore] pam_succeed_if.so service in crond quiet use_uid
session     required      pam_unix.so
session     optional      pam_ldap.so
- /etc/sysconfig/authconfig
[root@localhost ~]# more /etc/sysconfig/authconfig

USELDAP=yes
USELDAPAUTH=yes
USELOCAUTHORIZE=yes
USESHADOW=yes
....
- /etc/ssh/sshd_config
[root@localhost ~]# cat /etc/ssh/sshd_config | grep UsePAM
# WARNING: 'UsePAM no' is not supported in Red Hat Enterprise Linux and may cause several
UsePAM yes
[root@localhost ~]#
4.3. 重启服务nslcd
[root@localhost ~]# systemctl restart nslcd
[root@localhost ~]# systemctl restart sshd
4.4. 验证
创建 test02.ldif文件
dn: uid=test02,ou=Group,dc=yss,dc=com
uid: test02
cn: test02
objectClass: account
objectClass: posixAccount
objectClass: top
objectClass: shadowAccount
userPassword: {crypt}!!
shadowLastChange: 18663
shadowMin: 0
shadowMax: 99999
shadowWarning: 7
loginShell: /bin/bash
uidNumber: 6666
gidNumber: 666
homeDirectory: /home/test02
需要注意的事情 :
- uid 和 cn 一般都是相同的
- uidNumber 是用户的id , 这个一定要改, 要是不存在的用户组id
- loginShell 默认 /bin/bash 就行
- gidNumber 这个是用户组的id
- homeDirectory : 用户的home目录
使用su指令进行切换就行…
[root@localhost home]# su -l test02
创建目录 '/home/test02'。
上一次登录:三 3月 17 15:29:57 CST 2021pts/3 上
[test02@localhost ~]$ pwd
/home/test02
[test02@localhost ~]$ id
uid=6666(test02) gid=0(root) 组=0(root)
五 .Kerberos同步
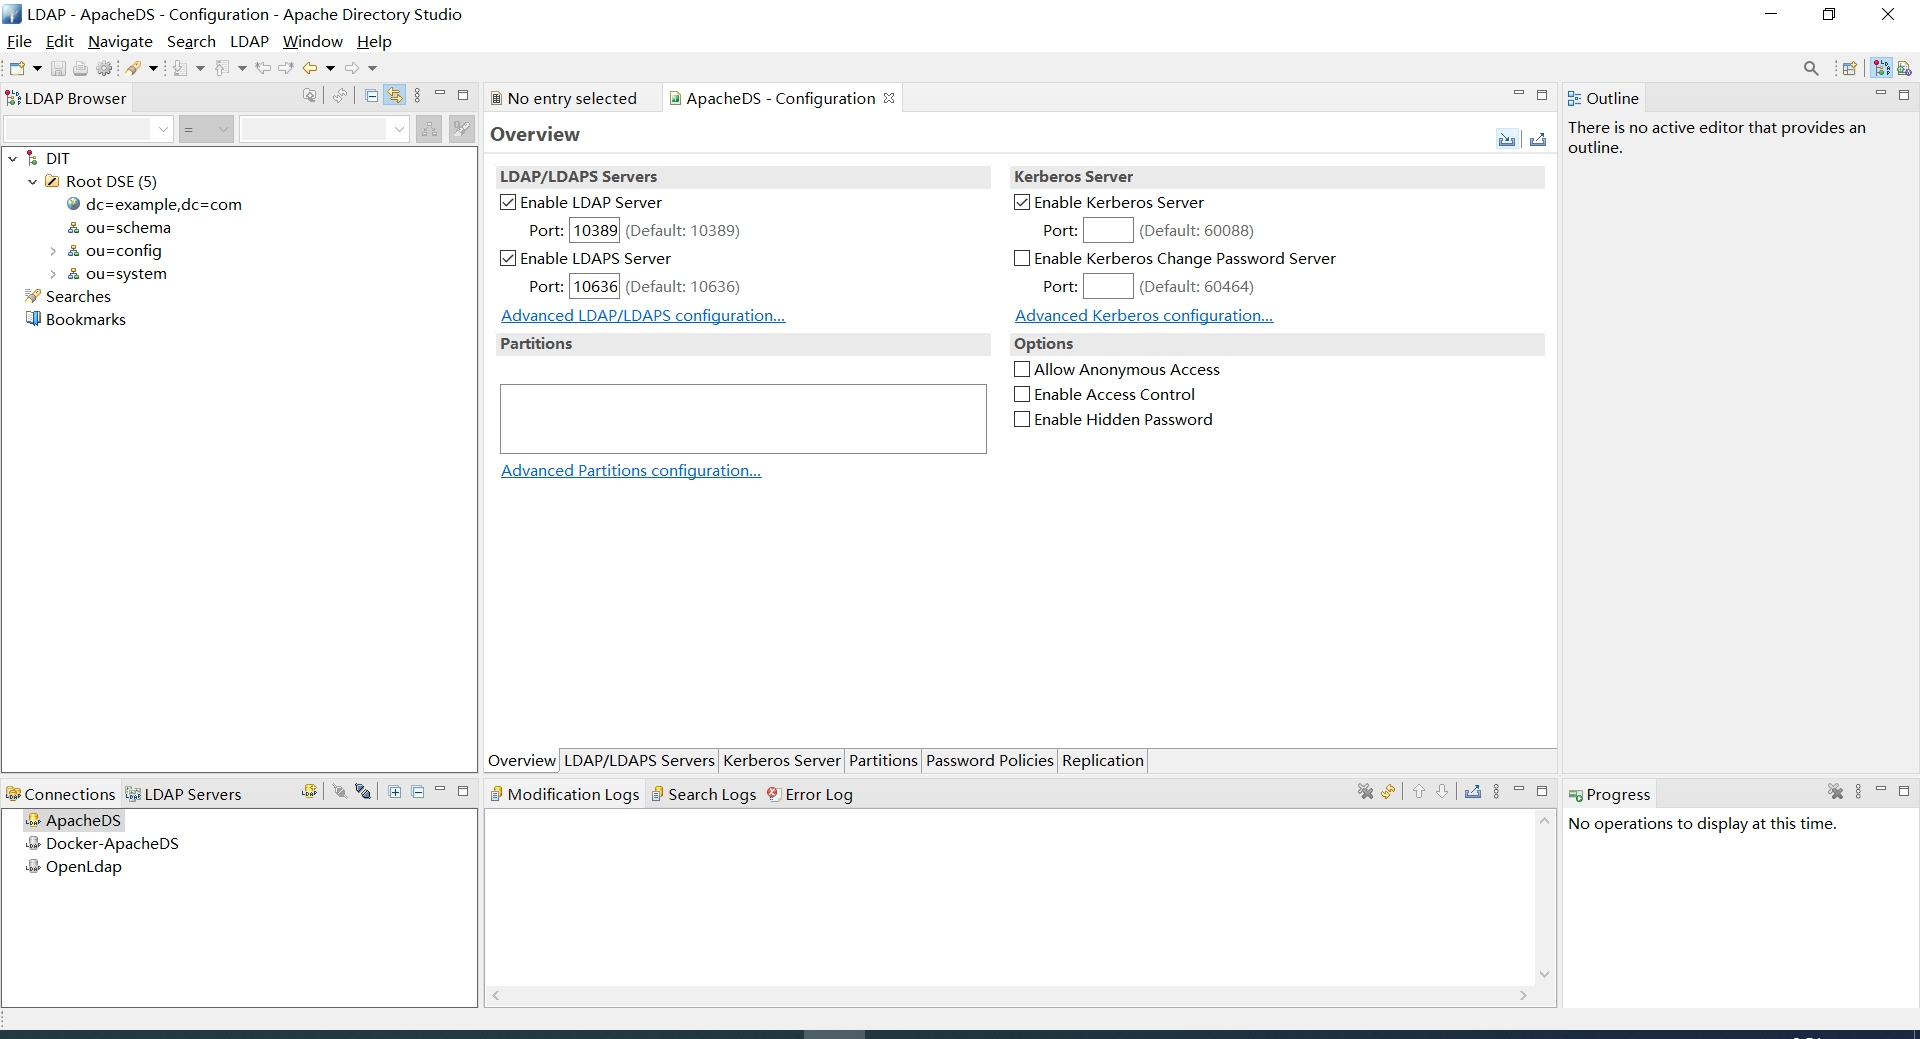
5.1. 修改ApacheDS 配置,开启Kerberos KDC
选取对应的服务器 , 鼠标右键单击 Open Configuration .
打开配置页面,勾选上Enable Kerberos Server, Enable Kerberos Change Password Server,改完之后 Control + S 保存,
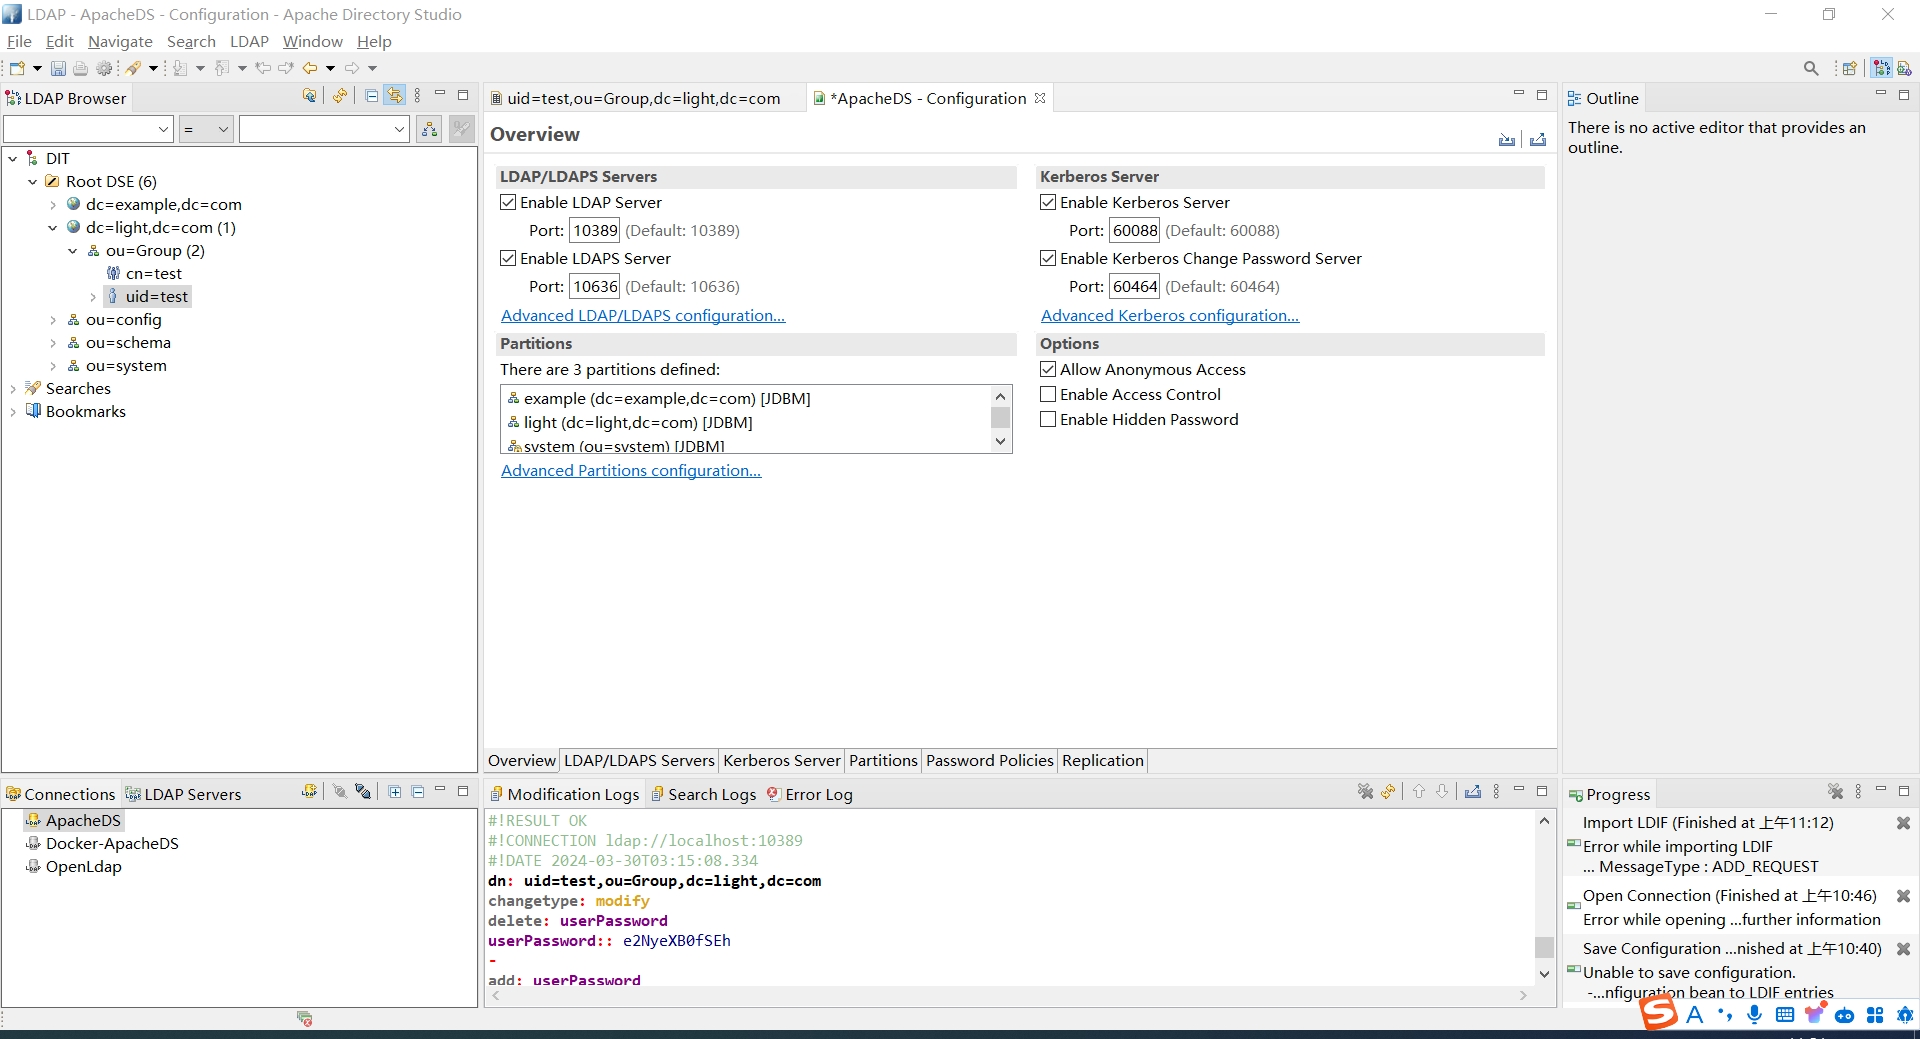
重启 ApacheDS 使配置生效。
5.2. 安装Kerberos client
安装Kerberos 客户端
yum install -y krb5-workstation krb5-libs krb5-auth-dialog
- krb5-workstation
- krb5-libs
- krb5-auth-dialog
5.3. 修改kerberos配置文件
修改/etc/krb5.conf文件, 配置kdc地址
vim /etc/krb5.conf
5.4. 添加Kerberos认证用户
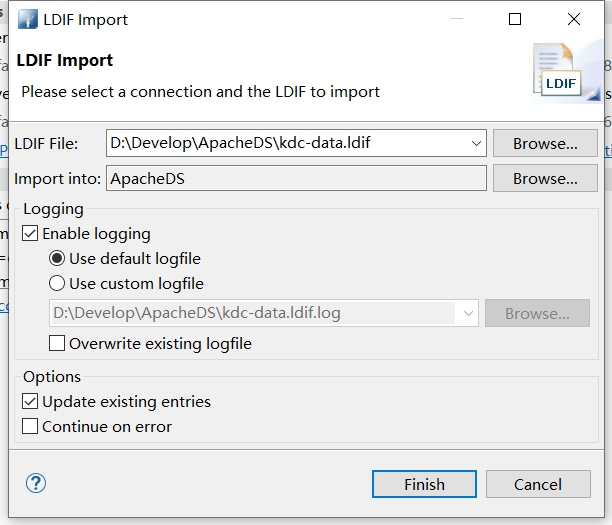
导入 kdc-data.ldif 到ldap ,文件内容如下
dn: dc=light,dc=com
objectClass: dcObject
objectClass: organization
objectClass: top
dc: light
o: light.com
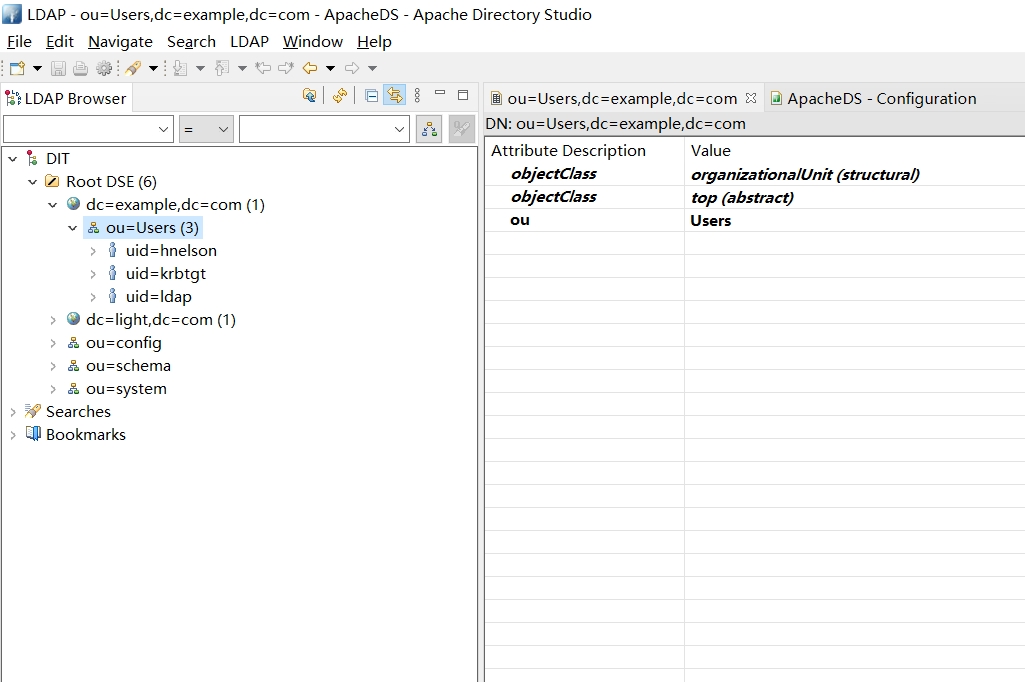
dn: ou=Users,dc=light,dc=com
objectClass: organizationalUnit
objectClass: top
ou: Users
dn: uid=hnelson,ou=Users,dc=light,dc=com
objectClass: top
objectClass: person
objectClass: inetOrgPerson
objectClass: krb5principal
objectClass: krb5kdcentry
cn: Horatio Nelson
sn: Nelson
uid: hnelson
userPassword: secret
krb5PrincipalName: hnelson@LIGHT.COM
krb5KeyVersionNumber: 0
dn: uid=krbtgt,ou=Users,dc=light,dc=com
objectClass: top
objectClass: person
objectClass: inetOrgPerson
objectClass: krb5principal
objectClass: krb5kdcentry
cn: KDC Service
sn: Service
uid: krbtgt
userPassword: secret
krb5PrincipalName: krbtgt/LIGHT.COM@LIGHT.COM
krb5KeyVersionNumber: 0
dn: uid=ldap,ou=Users,dc=light,dc=com
objectClass: top
objectClass: person
objectClass: inetOrgPerson
objectClass: krb5principal
objectClass: krb5kdcentry
cn: LDAP
sn: Service
uid: ldap
userPassword: randall
krb5PrincipalName: ldap/localhost@LIGHT.COM
krb5KeyVersionNumber: 0
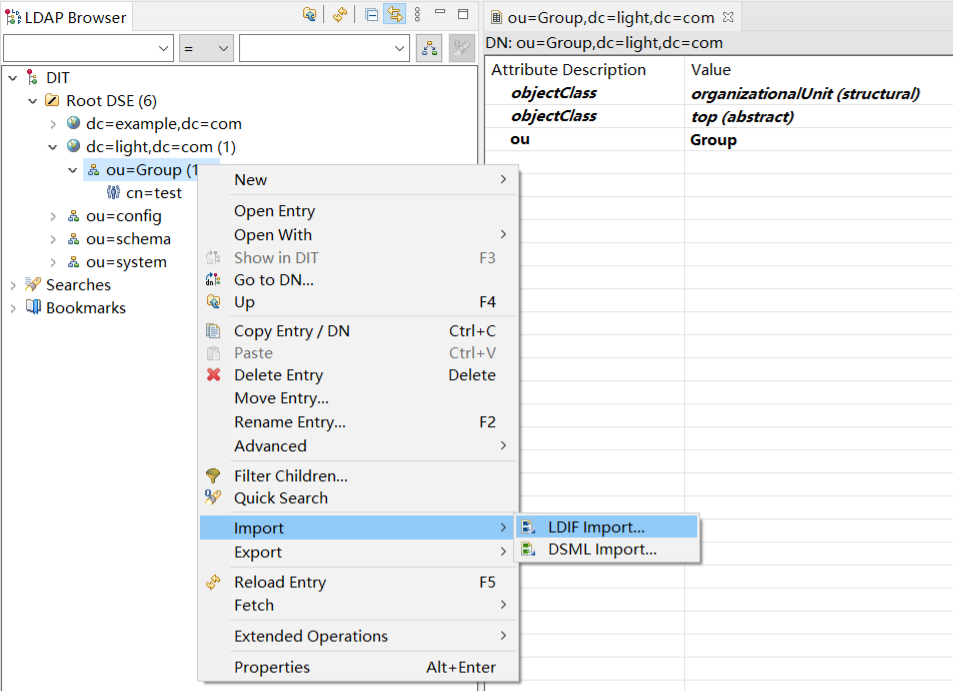
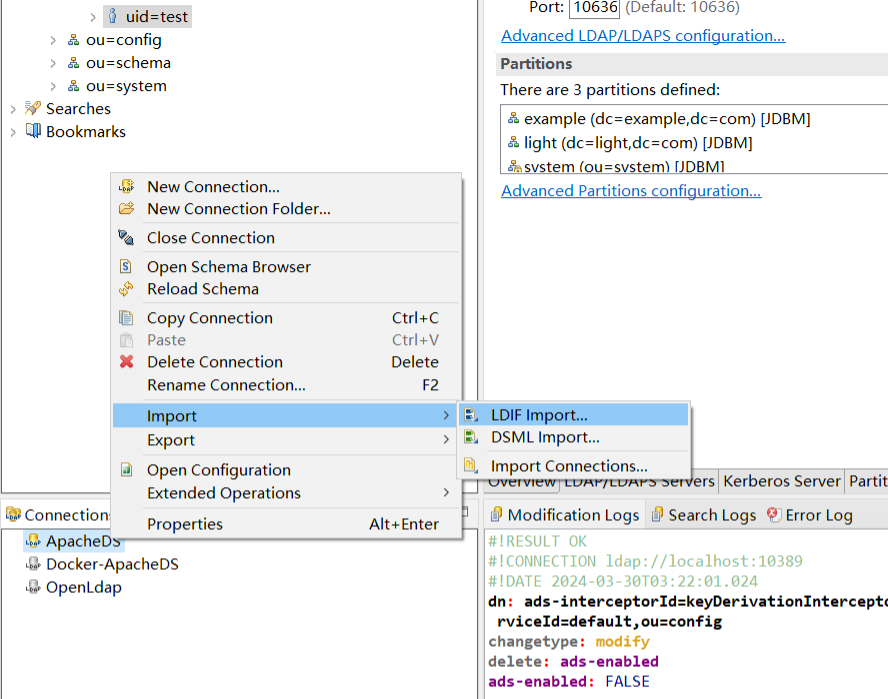
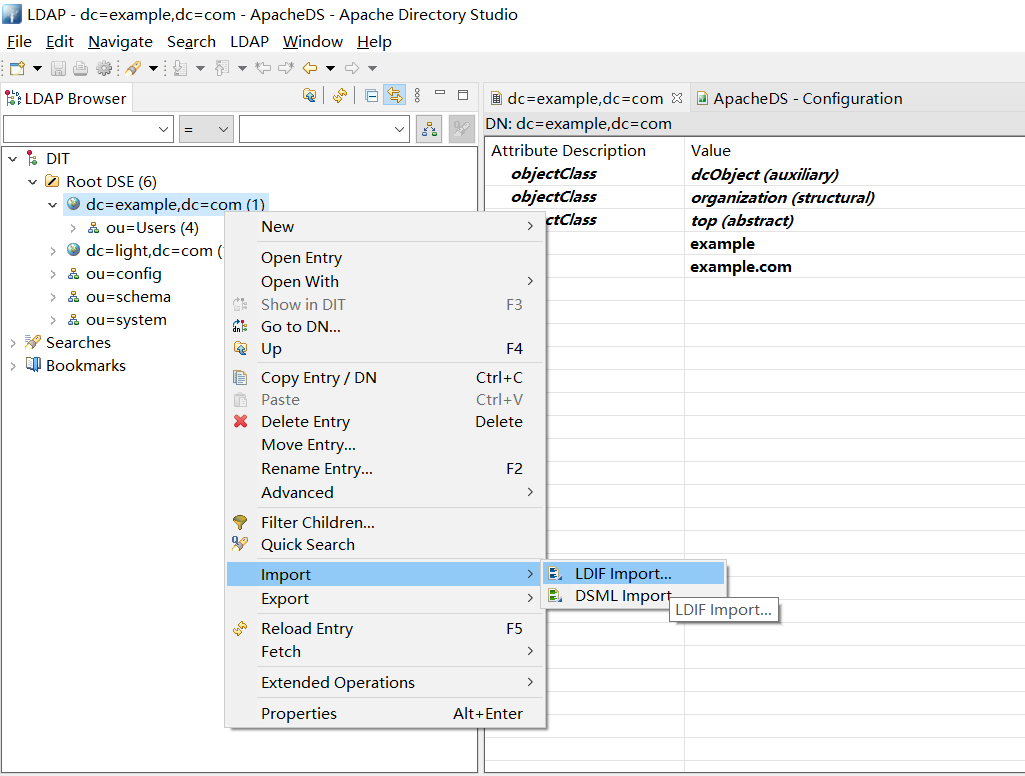
通过Apache Directory Studio,右键点击连接名称 ApacheDS -> Import -> LDIF Import 选择指定文件。
导入成功
5.5. kerberos 验证
#输入密码 文件中指定的是secret
[root@localhost apacheds-2.0.0.AM2]# kinit hnelson
Password for hnelson@LIGHT.COM:

#查看ticket
[root@localhost apacheds-2.0.0.AM2]# klist
Ticket cache: KEYRING:persistent:0:0
Default principal: hnelson@LIGHT.COM

Valid starting       Expires              Service principal
2021-03-17T16:19:26  2021-03-18T16:19:12  krbtgt/LIGHT.COM@LIGHT.COM
	renew until 2021-03-24T16:19:12
5.6. kerberos 导出keytab文件
使用ktutil 导出keytab 文件
[root@localhost apacheds-2.0.0.AM2]# ktutil
ktutil:  add_entry -password -p hnelson@LIGHT.COM -k 1 -e aes128-cts-hmac-sha1-96
Password for hnelson@LIGHT.COM:
ktutil:  wkt /opt/hnelson.keytab
ktutil:  q
[root@localhost apacheds-2.0.0.AM2]#
add_entry 为每一种加密方式添加keytab ,然后用wkt 将keytab写入到文件。
5.7. 验证keytab文件
[root@localhost apacheds-2.0.0.AM2]#  kinit -kt  /opt/hnelson.keytab hnelson
[root@localhost apacheds-2.0.0.AM2]# klist
Ticket cache: KEYRING:persistent:0:0
Default principal: hnelson@LIGHT.COM

Valid starting       Expires              Service principal
2021-03-17T16:31:43  2021-03-18T16:31:38  krbtgt/LIGHT.COM@LIGHT.COM
	renew until 2021-03-24T16:31:38
六 .linux与kerberos用户统一
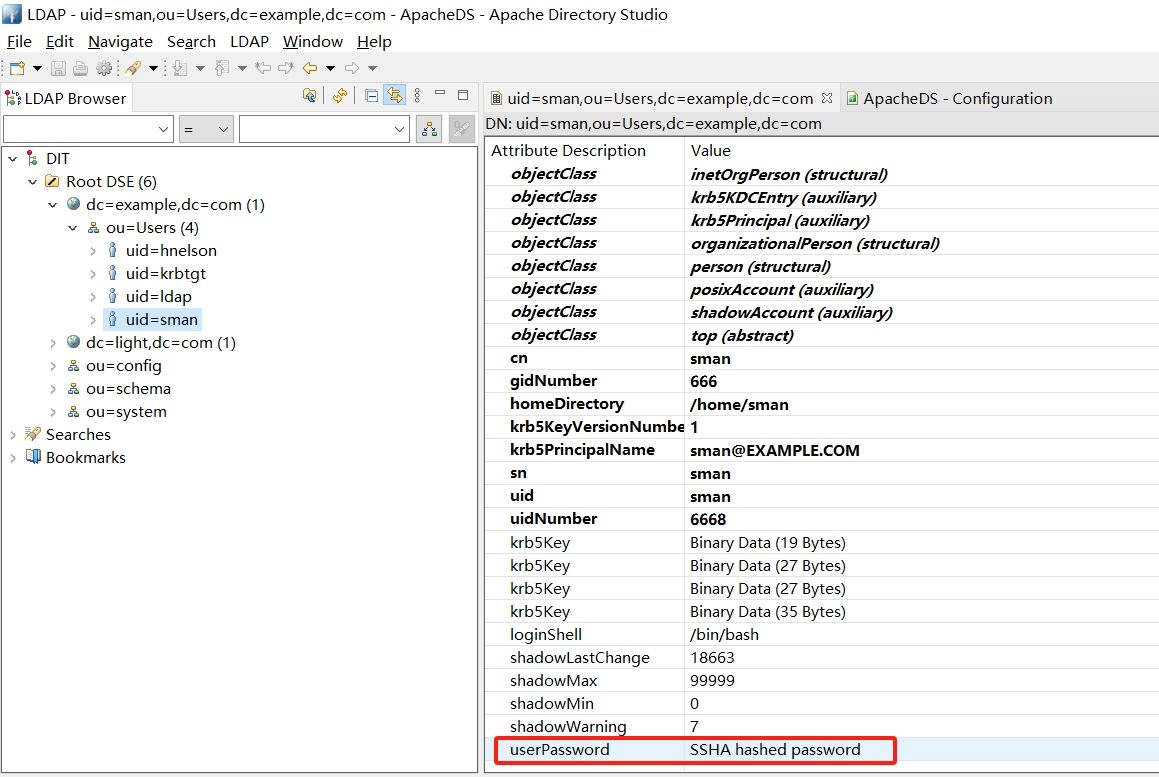
- sman用户的ldif配置
注意 要和kerberos的认证在同一个域下面.
dn: uid=sman,ou=Users,dc=light,dc=com
objectClass: inetOrgPerson
objectClass: krb5KDCEntry
objectClass: krb5Principal
objectClass: organizationalPerson
objectClass: person
objectClass: posixAccount
objectClass: shadowAccount
objectClass: top
cn: sman
gidNumber: 666
homeDirectory: /home/sman
krb5KeyVersionNumber: 1
krb5PrincipalName: sman@LIGHT.COM
sn: sman
uid: sman
uidNumber: 6668
krb5Key:: MBGgAwIBA6EKBAgs3IwczpIjCA==
krb5Key:: MBmgAwIBEaESBBDZ4KQ8CUaBfkx/xz+Mo6nf
krb5Key:: MBmgAwIBF6ESBBA+wfd6dpePW9BH3npNz4gx
krb5Key:: MCGgAwIBEKEaBBhMSqjaSWQWy4yiAaQq6lgVdvhu1jjaFtM=
loginShell: /bin/bash
shadowLastChange: 18663
shadowMax: 99999
shadowMin: 0
shadowWarning: 7
userPassword:: e1NTSEF9eG5LRUJMNVljNTA4amtkQ3NBLzA2NW1QU3ltOEFVMS9KUjVOclE9PQ==
- 直接导入即可.
- 查看sman

- 修改密码,更改后密码为
sman
- 验证
[root@localhost conf]# su -l sman
创建目录 '/home/sman'。
[sman@localhost ~]$
[root@localhost ~]# kinit sman
Password for sman@LIGHT.COM:
[root@localhost ~]# klist
Ticket cache: KEYRING:persistent:0:krb_ccache_CwJLBLC
Default principal: sman@LIGHT.COM

Valid starting       Expires              Service principal
2021-03-17T17:28:23  2021-03-18T17:28:16  krbtgt/LIGHT.COM@LIGHT.COM
	renew until 2021-03-24T17:28:16
- LDAP 服务器配置
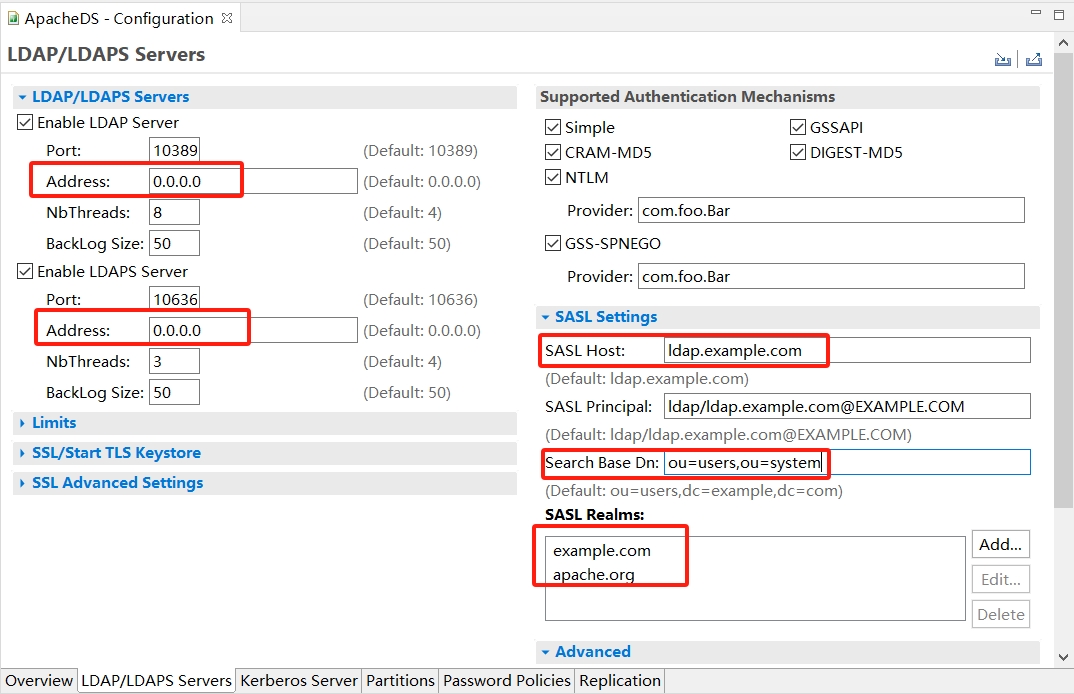
- Address : kerberos-server-01
- Address : kerberos-server-01
- SASL Host: kerberos-server-01
- SASL principal: ldap/kerberos-server-01@LIGHT.COM
- Search Base DN: ou=Users,dc=light,dc=com
- SASL Realms: LIGHT.COM
- Kerberos服务器配置
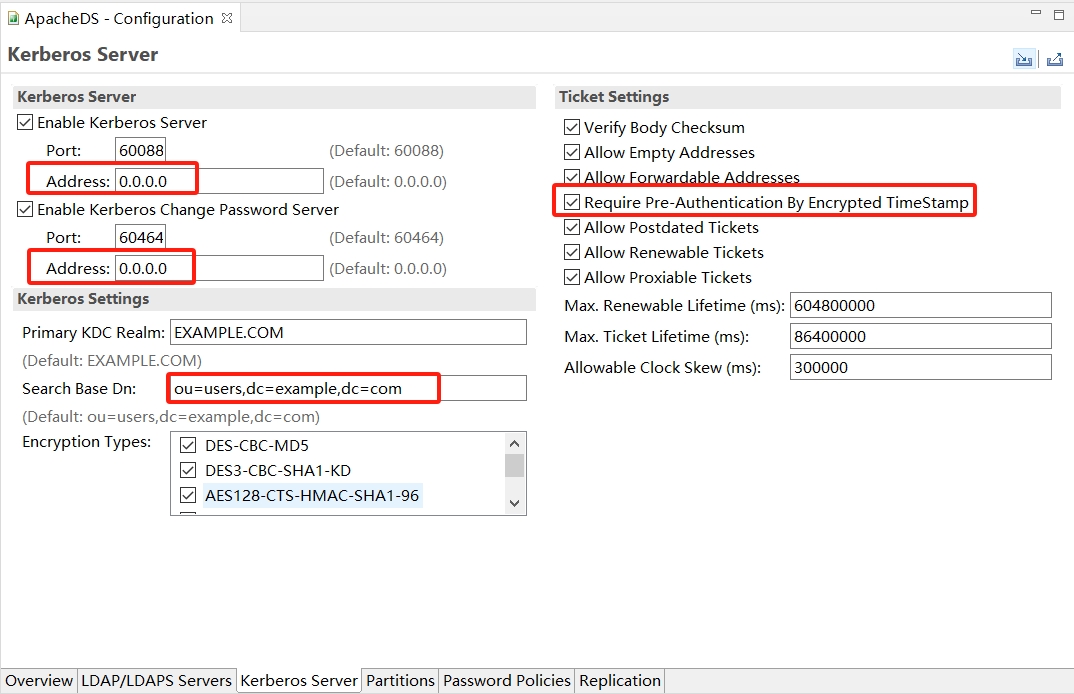
- Address : kerberos-server-01
- Address : kerberos-server-01
- Requeire Pre-Authentication By Encrypted Timestamp: 不勾选
- Search Base DN: ou=Users,dc=light,dc=com