SAS-Spring-Boot-Authorization-Server-Addition
一、Spring boot 与Spring authorization Server集成流程说明
- 创建项目
- 添加依赖
- 初始化数据库(用户授权确认表、用户认证信息表和客户端信息表)
- 创建
AuthorizationConfig(名字自定)类 - 配置认证端点过滤器链,添加身份认证过滤器了、密码解析器、
jws相关配置和认证服务设置 - 配置上添加
@Configuration、@EnableWebSecurity和@EnableMethodSecurity注解 - 添��加一个接口,将登录和用户授权确认页面请求转发至自定义的页面
- 在
application.yml中配置数据源信息 - 添加自定义页面相关静态文件
二、细节补充
在上一篇文章中的AuthorizationConfig.java配置类中,类上有三个注解,分别是@Configuration、@EnableWebSecurity和@EnableMethodSecurity注解,虽然在类中有注释,但是这里在细讲一下,同时放一下官网的说明
1. @EnableWebSecurity
- 加载了
WebSecurityConfiguration配置类, 配置安全认证策略。 - 加载了
AuthenticationConfiguration, 配置了认证信息。
2. @EnableMethodSecurity 官网文档说明
默认启用方法级别的安全校验
- 设置注解属性
jsr250Enabled = true是为了启用JSR250注解支持,例如@RolesAllowed、@PermitAll和@DenyAll注解 - 设置属性
securedEnabled = true是为了启用@Secured注解支持,不设置属性则添加@Secured注解无效
3. @Configuration 文档说明地址
- 在Spring security 6.0 版本及之后版本中将
@Configuration注解从@EnableWebSecurity,@EnableMethodSecurity,@EnableGlobalMethodSecurity和@EnableGlobalAuthentication中移除,使用这些注解需手动添加@Configuration注解
三、测试
1. 授权码模式获取token
该流程上一章已经说过了,本篇文章就大概过一下
1. 组装url发起授权请求
http://127.0.0.1:8080/oauth2/authorize?client_id=messaging-client&response_type=code&scope=message.read&redirect_uri=http://127.0.0.1:8080/login/oauth2/code/messaging-client-oidc
参数解释
client_id:客户端的idresponse_type:授权码模式固定为codescope:请求授权的范围redirect_uri:回调地址
2. 重定向至登录页面
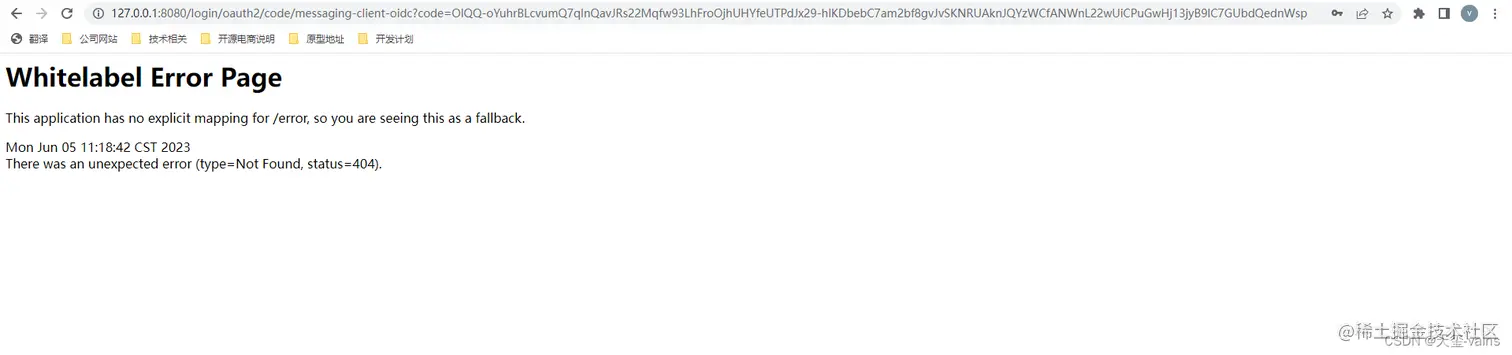
3. 重定向至回调地址
该客户端已经经过用户授权确认了,授权确认信息表中已存在,所以直接重定向至回调地址
4. 复制code至postman发起请求
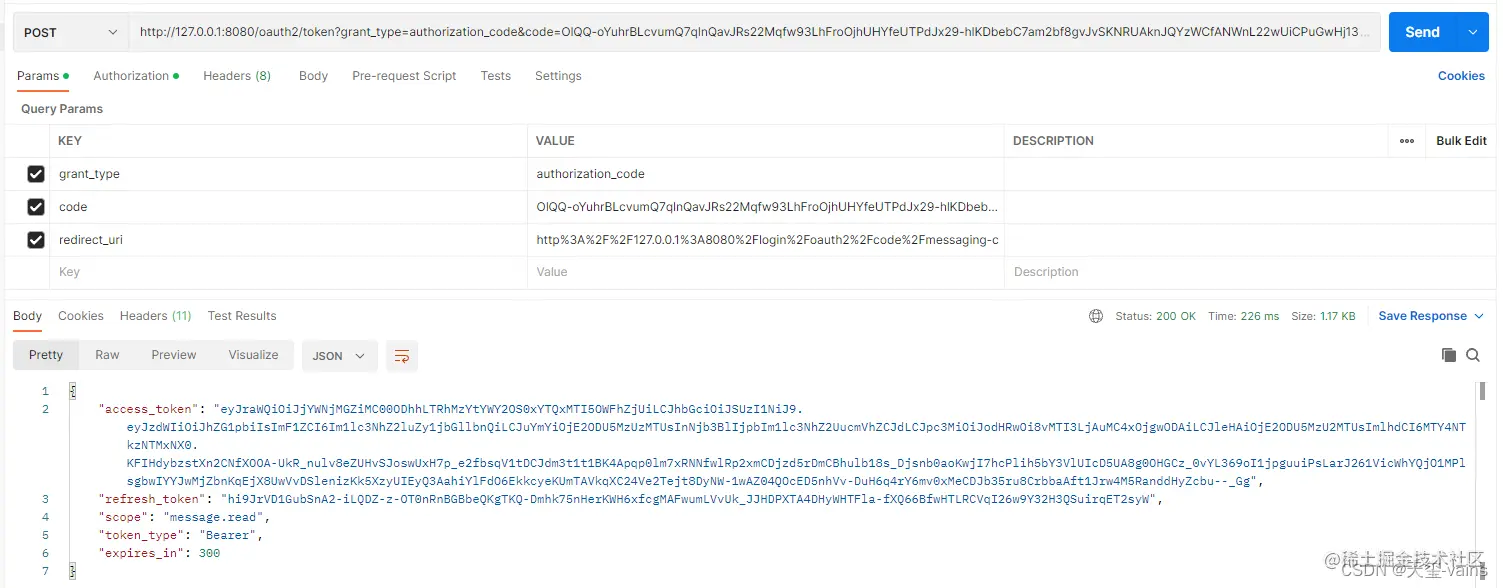
添加Basic Auth(客户端id和客户端秘钥)
grant_type: 在授权码模式中固定为authorization_coderedirect_uri:与第一步请求授权时携带的redirect_uri一致,并且是严格匹配模式,客户端配置中不能只配置一个域名code:重定向至redirect_uri携带的code参数
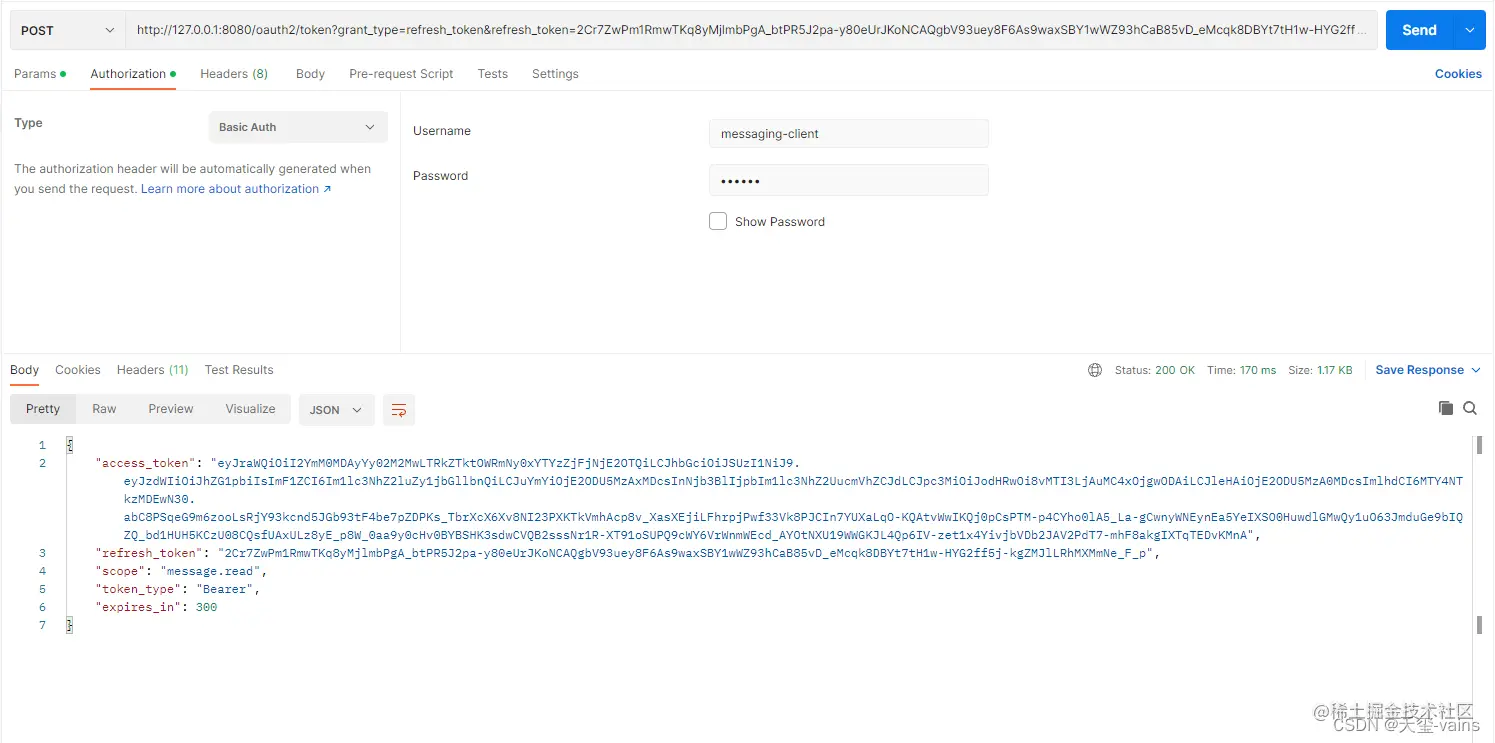
2. 刷新token
上一步通过授权码模式获取了一个token,如上图,现在尝试下使用响应中的refresh_token来刷新一下token看看
对/oauth2/token接口发起一个POST请求,请求参数为grant_type和refresh_token,还有客户端的相关认证
grant_type:刷新token时固定值为refresh_tokenrefresh_token:请求/oauth2/token接口响应数据中的refresh_token
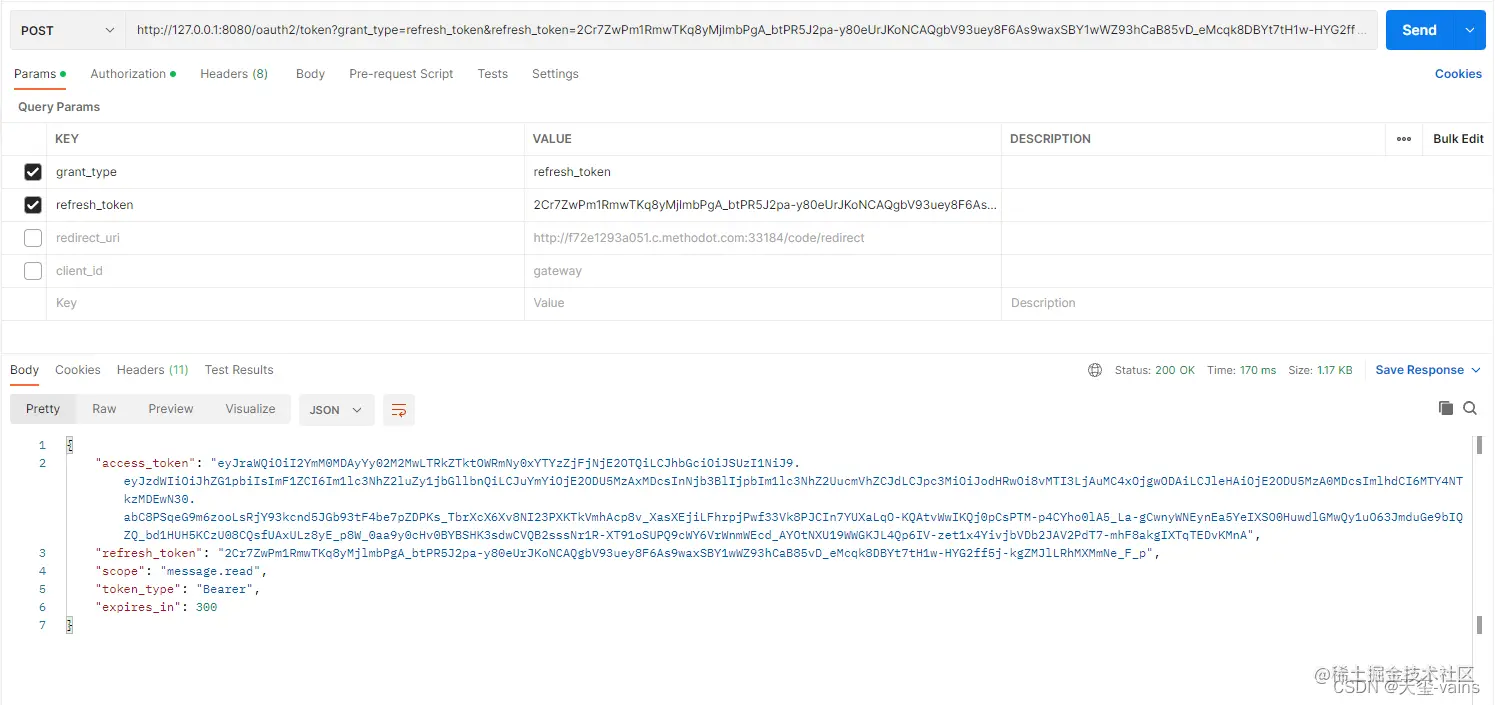
另外,不要忘了basic auth的请求头
接下来编写一个测试接口并添加@PreAuthorize("hasAuthority('app')")注解,设置只有拥有app权限的人才能访问接口,如下
package com.example.controller;

import org.springframework.security.access.prepost.PreAuthorize;
import org.springframework.web.bind.annotation.GetMapping;
import org.springframework.web.bind.annotation.RestController;

/**
 * 测试接口
 *
 * @author vains
 */
@RestController
public class TestController {

    @GetMapping("/test01")
    @PreAuthorize("hasAuthority('app')")
    public String test01() {
        return "test01";
    }

}
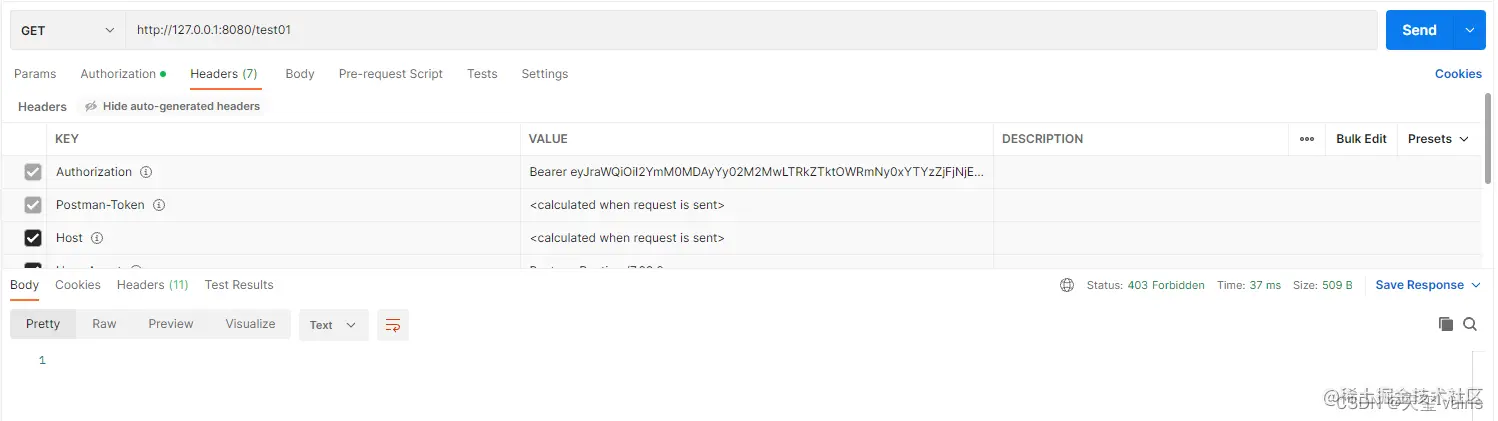
然后携带token去请求这个测试接口
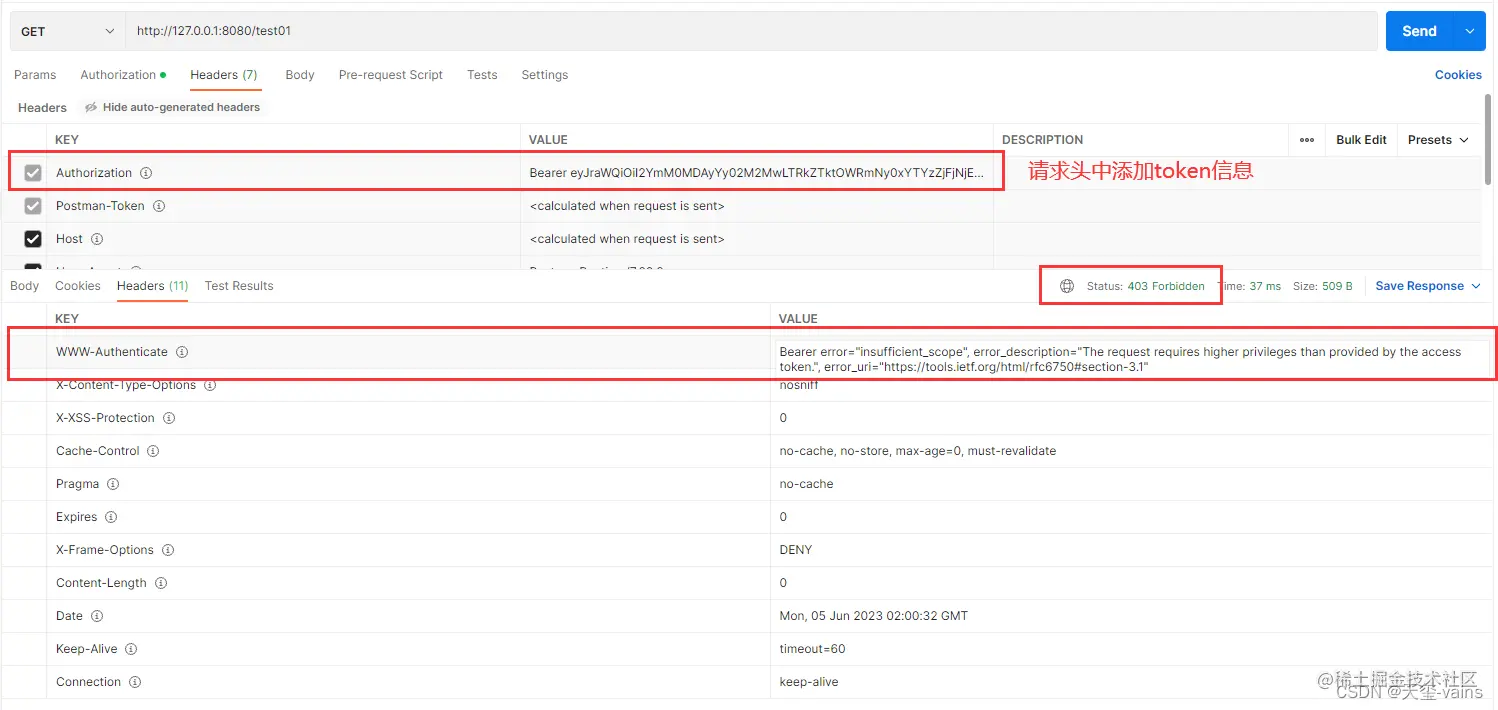
这时我们会发现接口响应403,并且错误信息都在响应头中,而响应内容是空的。如下
我们来看下框架中关于权限不足的默认实现,将提取出来的异常信息放入响应头中返回
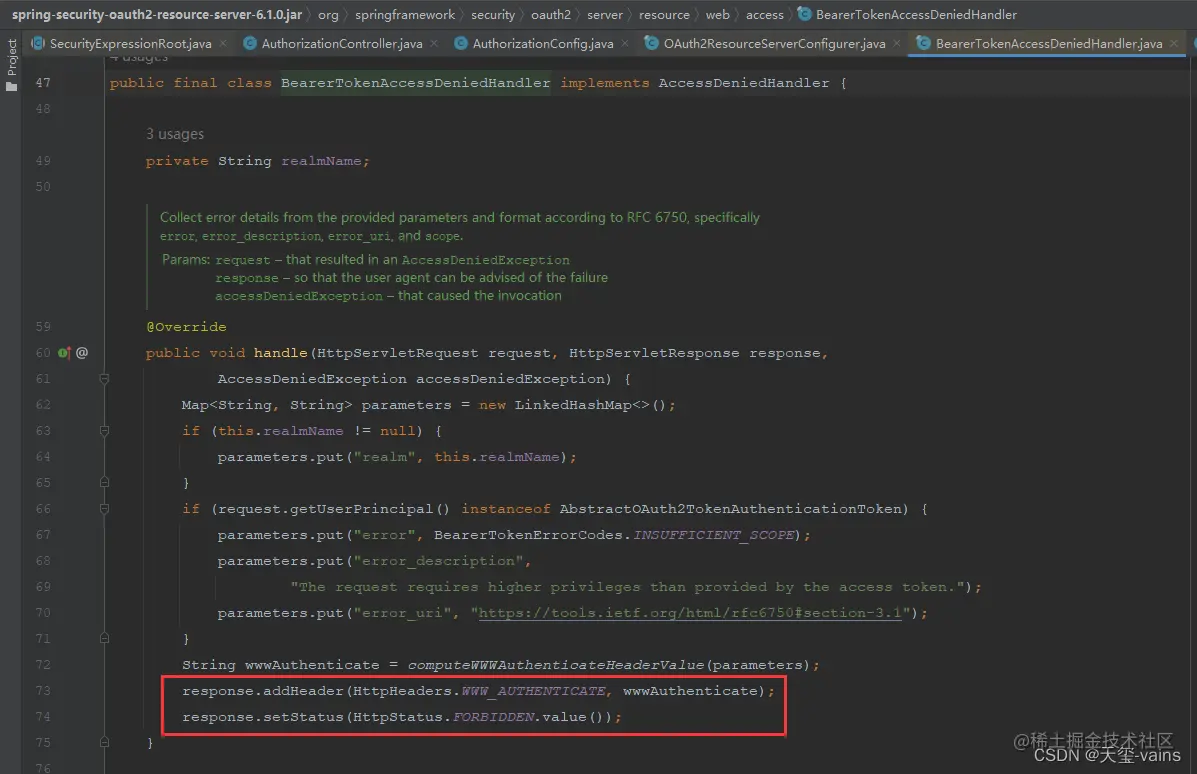
响应的错误信息在请求头中是因为源码中提到的RFC 6750和oauth2.1协议规范中的The WWW-Authenticate Response Header Field规定了异常信息的位置
接下来就是403的问题,之前我们获取token的时候是通过授权码流程获取token,oauth2的授权实际上是依赖客户端的scope,用户在发起授权时是通过申请客户端scope的方式来获取授权,所以token中此时实际上只有我们申请的scope权限,我们断点看一下携带token请��求时通过BearerTokenAuthenticationFilter解析token获取的认证信息。
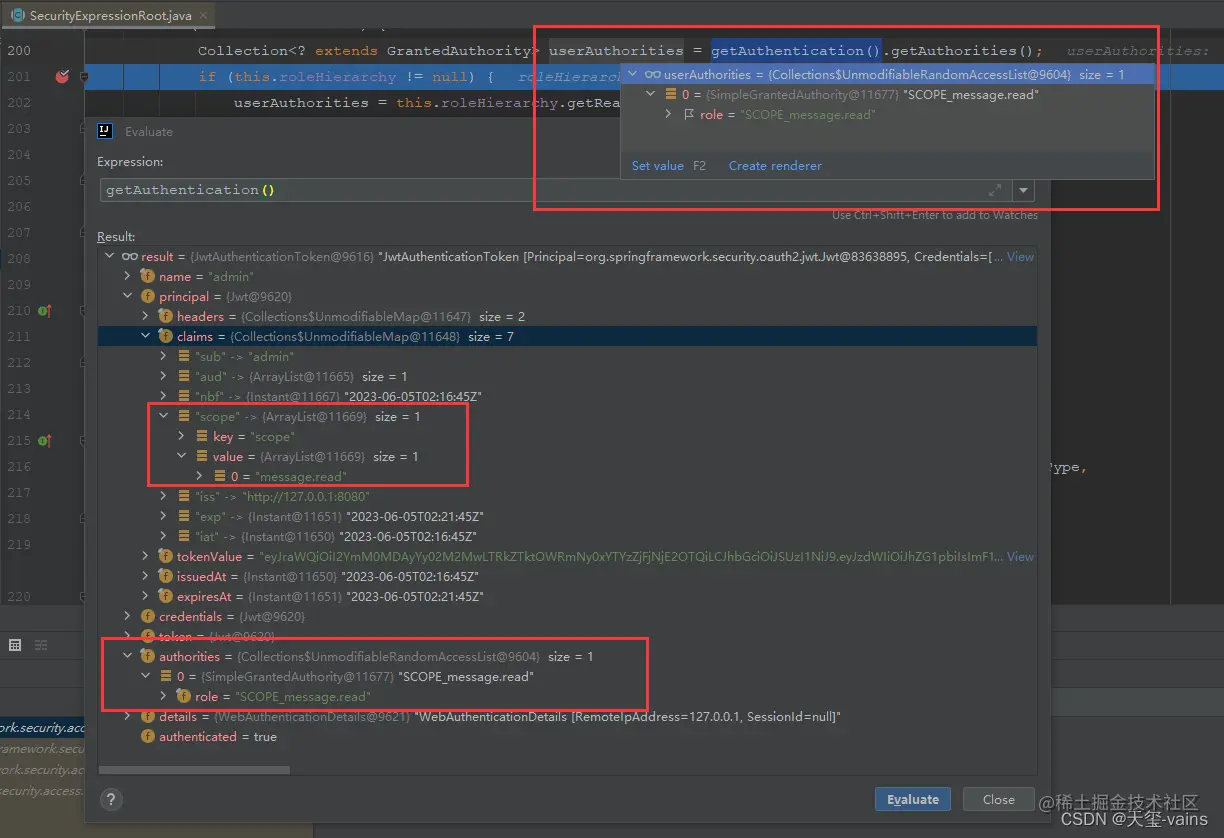
我们可以看到,通过token获取的权限只有scope的内容,并且有个前缀SCOPE_,这个前缀是在JwtGrantedAuthoritiesConverter类解析token时默认添加的,如下
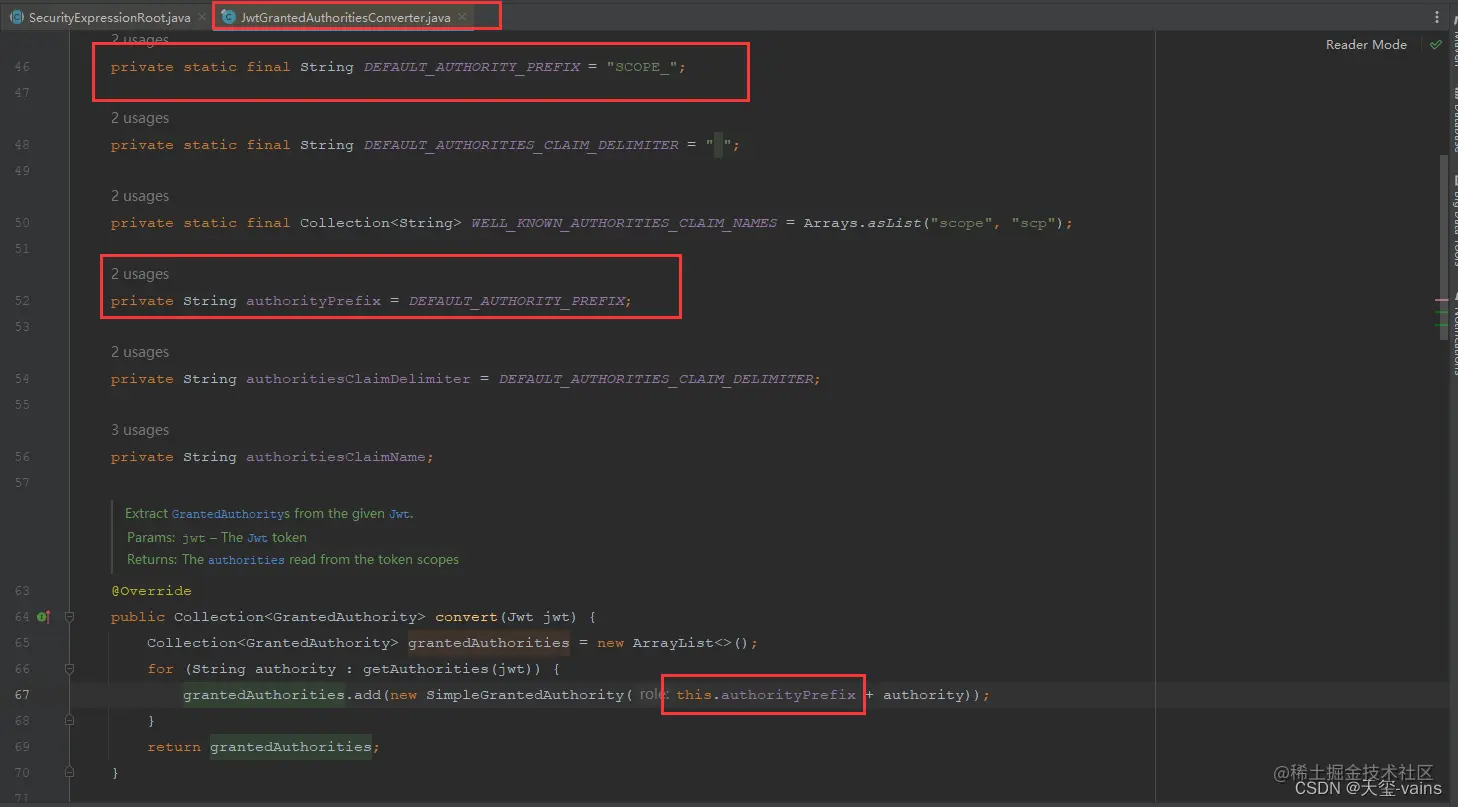
如果想要去除这个前缀则重写该类就行,详细内容请等待下一章扩展篇
按照这个规则将@PreAuthorize("hasAuthority('app')")中的值app改为SCOPE_message.read,重启重新访问
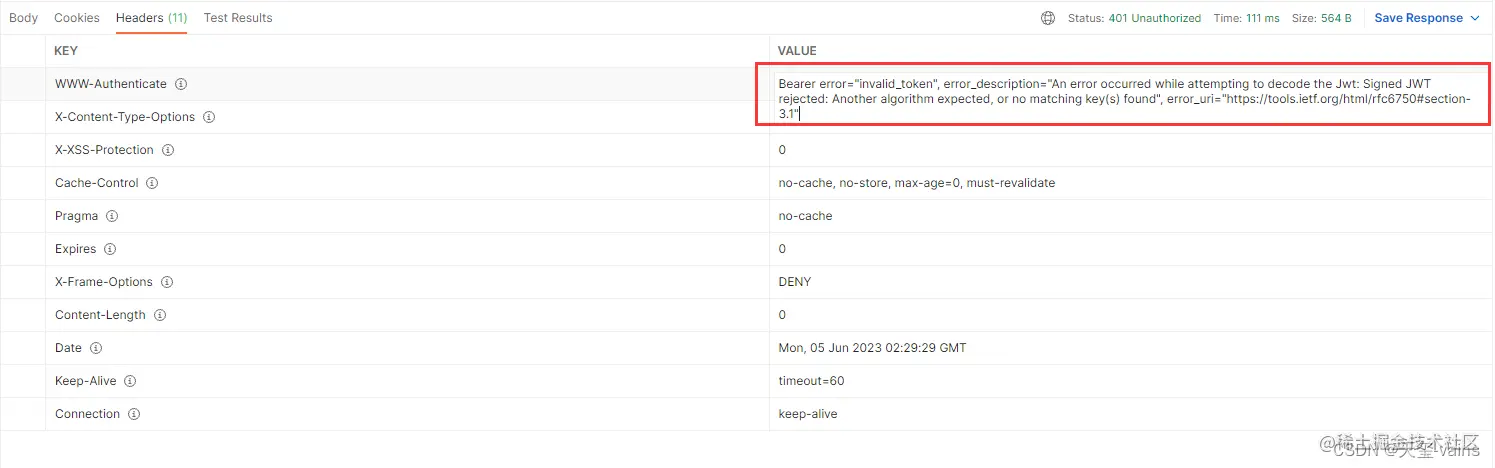
出现这个问题是因为重启后jws的配置发生了变化,无法正确解析token,重新调用一下刷新token的接口获取一个token就行
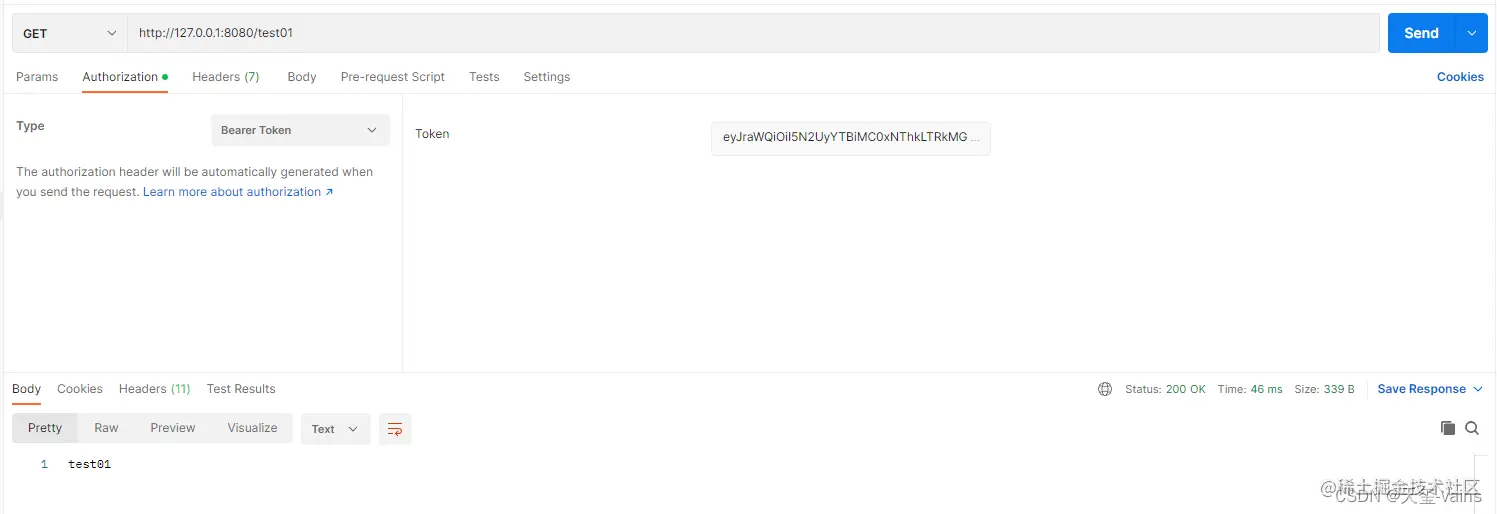
刷新token后访问接口,这时请求就正常了,没有响应403权限不足的提示了。
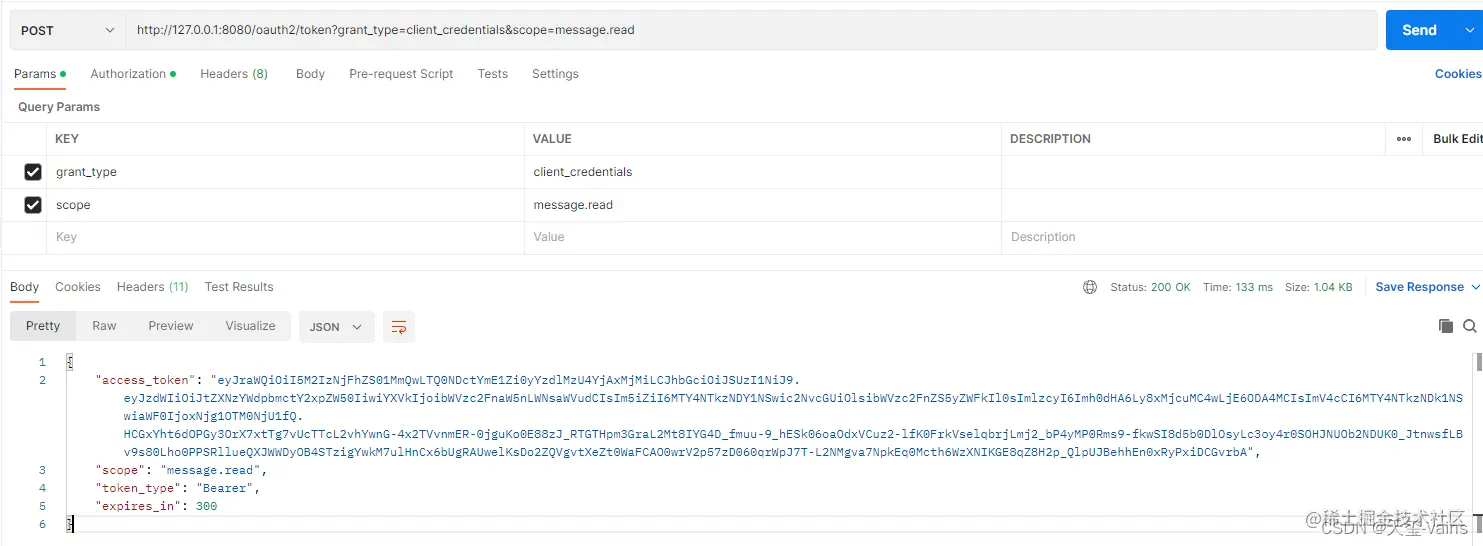
3. 客户端模式
该模式是为客户端准备的,客户端内部调用时可能会用到该模式
客户端模式的参数有四个,grant_type、scope、client_id和client_secret,客户端认证方式不是client_secret_post的客户端发起请求时只用携带grant_type参数即可,其它方式按照各自特点携带客户端的认证信息。

grant_type在客户端模式下固定为client_credentialsclient_id:客户端的idclient_secret: 客户端的秘钥scope:本次请求授权的范围
拼接完scope参数请求如下示例
4. 授权码扩展流程PKCE(Proof Key for Code Exchange)
首先需要添加一个公共客户端并且设置proof key支持,为求方便直接修改AuthorizationConfig.java,之后重启服务,会添加一条适用pkce流程的客户端
/**
* 配置客户端Repository
*
* @param jdbcTemplate db 数据源信息
* @param passwordEncoder 密码解析器
* @return 基于数据库的repository
*/
@Bean
public RegisteredClientRepository registeredClientRepository(JdbcTemplate jdbcTemplate, PasswordEncoder passwordEncoder) {
RegisteredClient registeredClient = RegisteredClient.withId(UUID.randomUUID().toString())
// 客户端id
.clientId("messaging-client")
// 客户端秘钥,使用密码解析器加密
.clientSecret(passwordEncoder.encode("123456"))
// 客户端认证方式,基于请求头的认证
.clientAuthenticationMethod(ClientAuthenticationMethod.CLIENT_SECRET_BASIC)
// 配置资源服务器使用该客户端获取授权时支持的方式
.authorizationGrantType(AuthorizationGrantType.AUTHORIZATION_CODE)
.authorizationGrantType(AuthorizationGrantType.REFRESH_TOKEN)
.authorizationGrantType(AuthorizationGrantType.CLIENT_CREDENTIALS)
// 授权码模式回调地址,oauth2.1已改为精准匹配,不能只设置域名,并且屏蔽了localhost,本机使用127.0.0.1访问
.redirectUri("http://127.0.0.1:8080/login/oauth2/code/messaging-client-oidc")
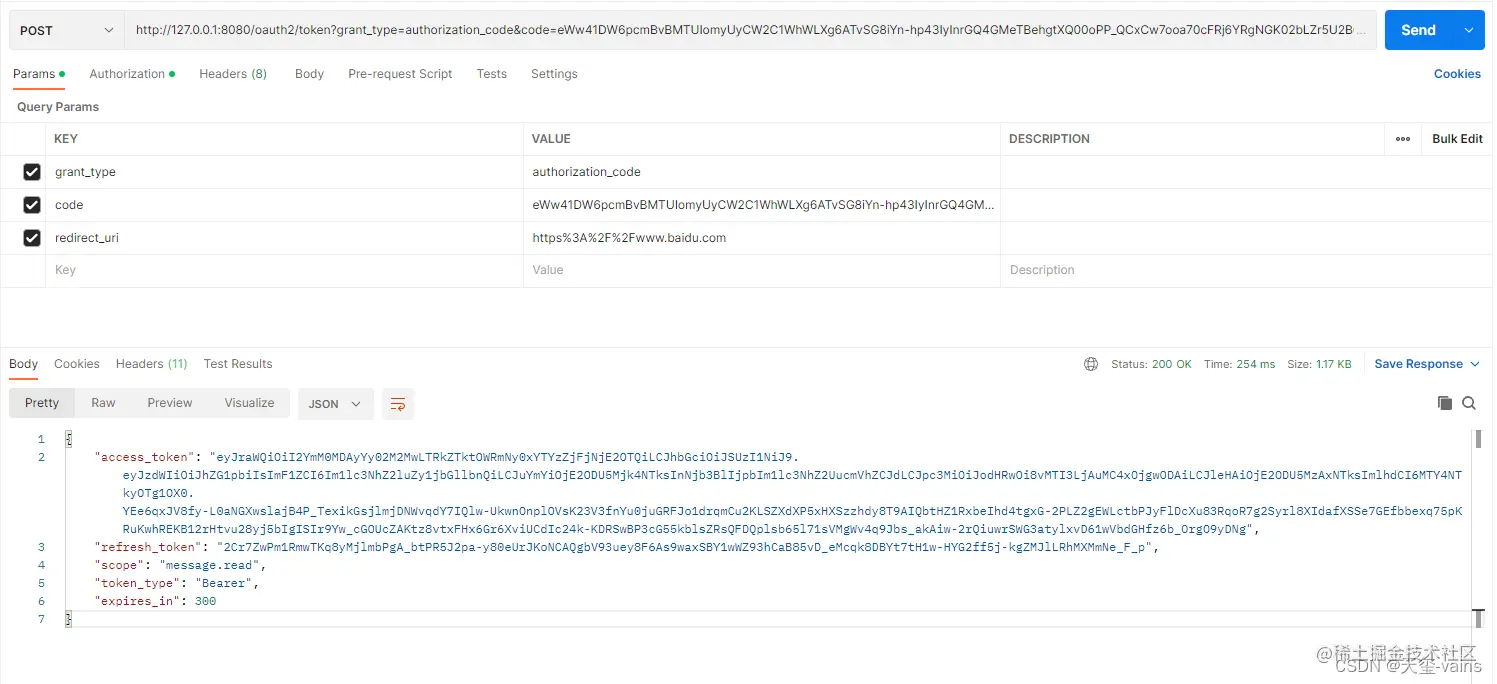
.redirectUri("https://www.baidu.com")
// 该客户端的授权范围,OPENID与PROFILE是IdToken的scope,获取授权时请求OPENID的scope时认证服务会返回IdToken
.scope(OidcScopes.OPENID)
.scope(OidcScopes.PROFILE)
// 自定scope
.scope("message.read")
.scope("message.write")
// 客户端设置,设置用户需要确认授权
.clientSettings(ClientSettings.builder().requireAuthorizationConsent(true).build())
.build();
// 基于db存储客户端,还有一个基于内存的实现 InMemoryRegisteredClientRepository
JdbcRegisteredClientRepository registeredClientRepository = new JdbcRegisteredClientRepository(jdbcTemplate);
// 初始化客户端
RegisteredClient repositoryByClientId = registeredClientRepository.findByClientId(registeredClient.getClientId());
if (repositoryByClientId == null) {
registeredClientRepository.save(registeredClient);
}
// 设备码授权客户端
RegisteredClient deviceClient = RegisteredClient.withId(UUID.randomUUID().toString())
.clientId("device-message-client")
// 公共客户端
.clientAuthenticationMethod(ClientAuthenticationMethod.NONE)
// 设备码授权
.authorizationGrantType(AuthorizationGrantType.DEVICE_CODE)
.authorizationGrantType(AuthorizationGrantType.REFRESH_TOKEN)
// 自定scope
.scope("message.read")
.scope("message.write")
.build();
RegisteredClient byClientId = registeredClientRepository.findByClientId(deviceClient.getClientId());
if (byClientId == null) {
registeredClientRepository.save(deviceClient);
}
// PKCE客户端
RegisteredClient pkceClient = RegisteredClient.withId(UUID.randomUUID().toString())
.clientId("pkce-message-client")
// 公共客户端
.clientAuthenticationMethod(ClientAuthenticationMethod.NONE)
// 设备码授权
.authorizationGrantType(AuthorizationGrantType.AUTHORIZATION_CODE)
.authorizationGrantType(AuthorizationGrantType.REFRESH_TOKEN)
// 授权码模式回调地址,oauth2.1已改为精准匹配,不能只设置域名,并且屏蔽了localhost,本机使用127.0.0.1访问
.redirectUri("http://127.0.0.1:8080/login/oauth2/code/messaging-client-oidc")
.clientSettings(ClientSettings.builder().requireProofKey(Boolean.TRUE).build())
// 自定scope
.scope("message.read")
.scope("message.write")
.build();
RegisteredClient findPkceClient = registeredClientRepository.findByClientId(pkceClient.getClientId());
if (findPkceClient == null) {
registeredClientRepository.save(pkceClient);
}
return registeredClientRepository;
}
1. 生成Code Verifier和Code Challenge
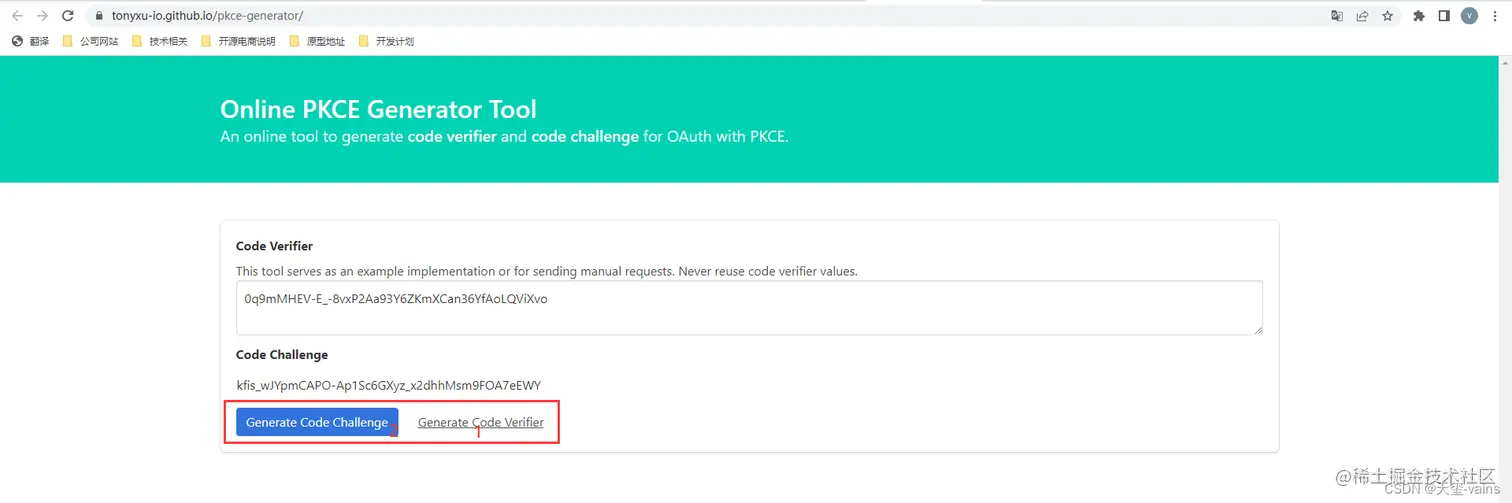
生成示例,先生成 Code Verifier 再生成 Code Challenge
Code Verifier:0q9mMHEV-E_-8vxP2Aa93Y6ZKmXCan36YfAoLQViXvoCode Challenge:kfis_wJYpmCAPO-Ap1Sc6GXyz_x2dhhMsm9FOA7eEWY
2. 拼接请求地址
http://127.0.0.1:8080/oauth2/authorize?response_type=code&client_id=pkce-message-client&redirect_uri=http://127.0.0.1:8080/login/oauth2/code/messaging-client-oidc&scope=message.read&code_challenge=kfis_wJYpmCAPO-Ap1Sc6GXyz_x2dhhMsm9FOA7eEWY&code_challenge_method=S256
参数说明
response_type: 固定值为codeclient_id:客户端idredirect_uri:获取授权的回调地址scope:请求授权的范围code_challenge:在CodeVerifier的SHA256值基础上,再用BASE64URL编码
3. 重定向至登录页面
授权接口检测到尚未登录,重定向至登录页面
4. 重定向至第2步指定的redirect_uri地址

5. 使用Postman模拟客户端发起请求获取token
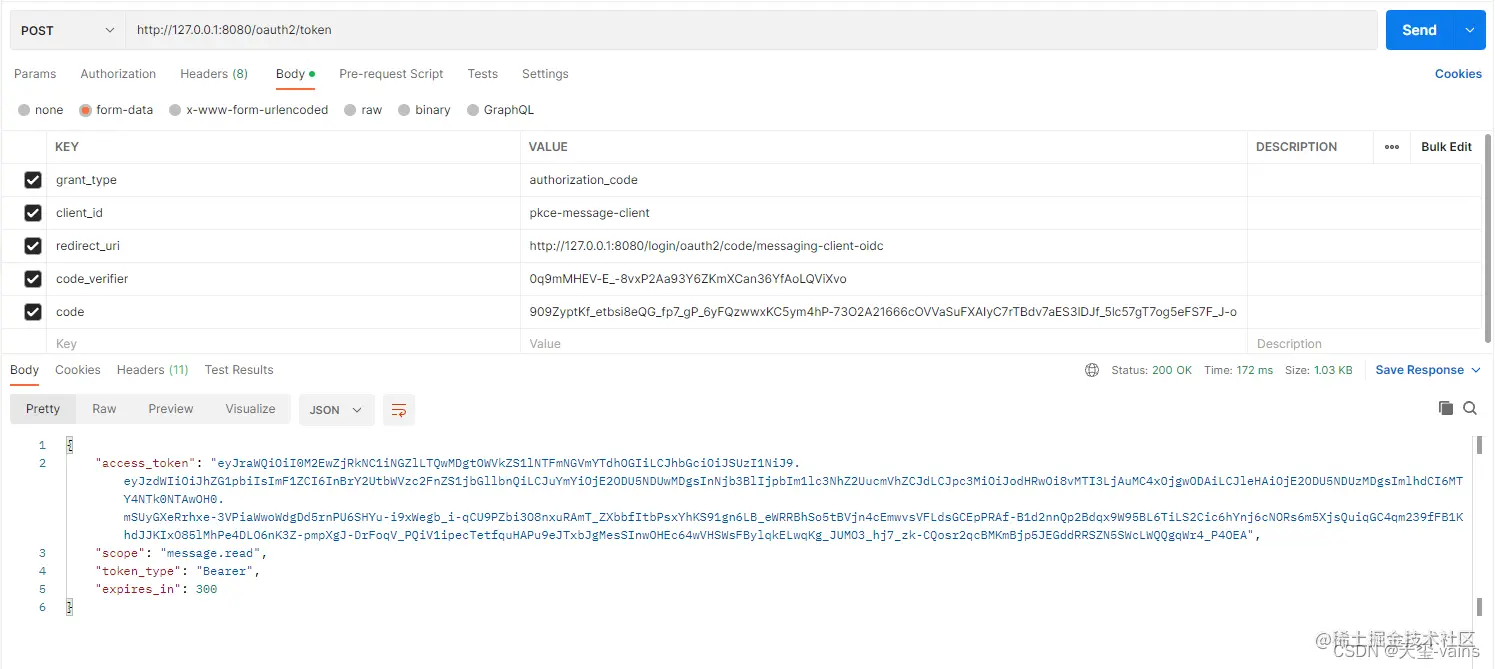
参数解释
grant_type: 跟授权码一样,固定为authorization_codeclient_id:客户端idredirect_uri:第2步中的回调地址code_verifier:第1步中生成的code_verifiercode:授权接口重定向至回调地址时携带的参数code
四、总结
至此oauth2.1的所有流程基本都测试了一遍,设备码因为需要在原有基础上进行扩展,也留到下一章的扩展篇一块儿测试,在以后的文章会有设备码流程、登录添加图形验证码、��自定义token生成和解析、自定义响应体和去除权限前缀等内容。